

Custom Search
Wednesday, December 8, 2010
Have your coffee at home and on the go


Chocolate Covered Dream Bites glutten free recipe
These rich and delicious brownie bites are flourless and gluten-free. The texture is in between brownies and fudge and well worth the time investment.
•1 tablespoon softened butter
•Cocoa powder for dusting pan.
•8 tablespoons (1 stick) butter
•8 ounces special dark or semisweet chocolate, chopped.
•5 (large) egg yolks
•3/4 cup sugar
•2 teaspoons pure vanilla extract .
•5 (large) egg whites
•1/2 teaspoon salt.
•For the Coating:
•8 ounces special dark or semi-sweet chocolate, chopped
•1 ounce food-grade wax or paraffin (such as Gulf Wax - see Notes), shaved thin
•1 Tbsp shortening (not butter or margarine)
•White chocolate chips or other flavored chocolate chips for decoration (or sprinkles)
Preheat the oven to 350 degrees F. Line a 9 x 9-inch baking pan with non-stick foil. Coat with 1 tablespoon of the butter and dust with cocoa powder, tapping out any excess.
In a double-boiler, melt the 8 ounces of chopped chocolate with the 8 tablespoons butter and stir occasionally until smooth and creamy. Remove from the heat and set aside to cool slightly (NOT in the refrigerator) while preparing the egg mixtures.
In a medium bowl, use an electric mixer to beat the egg yolks together with the sugar and vanilla until thick, stopping to scrape the sides of the bowl once or twice, for about 3 minutes. Set aside.
In a large aluminum bowl, beat the egg whites with the salt until stiff. Set aside.
Slowly and gently fold the chocolate into the yolk mixture, adding just a little chocolate at a time to keep the eggs from scrambling. When all the chocolate mixture has been incorporated, fold in the stiff egg whites.
Pour the batter into the prepared baking pan, and bake in the center of the oven until spongy, about 35 minutes. Remove from the oven and place the cake on a rack to cool completely.
When cake is cool, prepare chocolate coating by melting the wax and shortening in a double-boiler with gently simmering water in the bottom. Add 8 ounces chopped chocolate, stirring until completely smooth. Remove from heat.
Cut the cooled cake into 36 equal bite-size pieces by cutting cake first into quarters, then each quarter into 9 pieces.
Place a generous sheet of wax paper or plastic-coated butcher paper with shiny-side up on a work surface. Working a row at a time, paint a dollop of chocolate coating wide enough to cover the bottom of each piece. Immediately place cake pieces on warm chocolate before it cools, placing them about 1/4-inch apart. Continue until all pieces have a chocolate bottom.
Pipe or spoon remainder of warm chocolate coating (re-warm if necessary) over the tops of the cake pieces so they are completely covered. Quickly place one white chocolate chip atop each piece before the chocolate cools. Chill for two hours or overnight. Trim excess chocolate from bites before serving. (Save any excess chocolate. It can be melted and used again.)
Yield: 36 squares
recipe source: about.com
 shared on Gluten Free Homemaker
•1 tablespoon softened butter
•Cocoa powder for dusting pan.
•8 tablespoons (1 stick) butter
•8 ounces special dark or semisweet chocolate, chopped.
•5 (large) egg yolks
•3/4 cup sugar
•2 teaspoons pure vanilla extract .
•5 (large) egg whites
•1/2 teaspoon salt.
•For the Coating:
•8 ounces special dark or semi-sweet chocolate, chopped
•1 ounce food-grade wax or paraffin (such as Gulf Wax - see Notes), shaved thin
•1 Tbsp shortening (not butter or margarine)
•White chocolate chips or other flavored chocolate chips for decoration (or sprinkles)
Preheat the oven to 350 degrees F. Line a 9 x 9-inch baking pan with non-stick foil. Coat with 1 tablespoon of the butter and dust with cocoa powder, tapping out any excess.
In a double-boiler, melt the 8 ounces of chopped chocolate with the 8 tablespoons butter and stir occasionally until smooth and creamy. Remove from the heat and set aside to cool slightly (NOT in the refrigerator) while preparing the egg mixtures.
In a medium bowl, use an electric mixer to beat the egg yolks together with the sugar and vanilla until thick, stopping to scrape the sides of the bowl once or twice, for about 3 minutes. Set aside.
In a large aluminum bowl, beat the egg whites with the salt until stiff. Set aside.
Slowly and gently fold the chocolate into the yolk mixture, adding just a little chocolate at a time to keep the eggs from scrambling. When all the chocolate mixture has been incorporated, fold in the stiff egg whites.
Pour the batter into the prepared baking pan, and bake in the center of the oven until spongy, about 35 minutes. Remove from the oven and place the cake on a rack to cool completely.
When cake is cool, prepare chocolate coating by melting the wax and shortening in a double-boiler with gently simmering water in the bottom. Add 8 ounces chopped chocolate, stirring until completely smooth. Remove from heat.
Cut the cooled cake into 36 equal bite-size pieces by cutting cake first into quarters, then each quarter into 9 pieces.
Place a generous sheet of wax paper or plastic-coated butcher paper with shiny-side up on a work surface. Working a row at a time, paint a dollop of chocolate coating wide enough to cover the bottom of each piece. Immediately place cake pieces on warm chocolate before it cools, placing them about 1/4-inch apart. Continue until all pieces have a chocolate bottom.
Pipe or spoon remainder of warm chocolate coating (re-warm if necessary) over the tops of the cake pieces so they are completely covered. Quickly place one white chocolate chip atop each piece before the chocolate cools. Chill for two hours or overnight. Trim excess chocolate from bites before serving. (Save any excess chocolate. It can be melted and used again.)
Yield: 36 squares
recipe source: about.com
Amazon Deal of the Day : Arrested Development
Do you remember a few years back a T.V. series known as Arrested Development? If you were a fan you may be interested in this. The complete series is available for a real nice price perfect for yourself or a gift. Yesterday it was at 61.99 and today it is available for $27.99 Visit Amazon.com to take advantage of this deal


Cherry Bon Bon Cookies

1 cup butter, softened
1-1/2 cups confectioners' sugar
1 tablespoon whole milk
3 teaspoons Spice Island® Pure Vanilla Extract
2-3/4 cups all-purpose flour
1/4 teaspoon salt
CHRISTMAS GLAZE:
1-1/4 cups confectioners' sugar
1 to 2 tablespoons water
Red and green liquid food coloring
Colored sprinkles
CHOCOLATE GLAZE:
1 cup confectioners' sugar
1 to 2 tablespoons water
1 ounce unsweetened chocolate, melted
1 teaspoon Spice Island® Pure Vanilla Extract
1/2 cup chopped pecans or walnuts
Directions
Pat cherries dry with paper towels; set aside. In a large bowl, cream butter and confectioner's sugar until light and fluffy. Beat in milk and vanilla. Combine flour and salt; gradually add to creamed mixture.
Shape a tablespoonful of dough around each cherry, forming a ball. Place 2 in. apart on ungreased baking sheets. Bake at 350° for 14-16 minutes or until bottoms are browned. Remove to wire racks to cool.
For Christmas glaze, in a small bowl, combine confectioners' sugar and enough water to achieve a dipping consistency. Transfer half of the glaze to another bowl; tint one bowl green and the other red. Dip the tops of nine cookies in green glaze and nine cookies in red glaze, then decorate with sprinkles. Let stand until set.
For chocolate glaze, in a small bowl, combine confectioners' sugar and enough water to achieve dipping consistency. Stir in chocolate and vanilla. Dip the tops of remaining cookies in glaze, then sprinkle with nuts. Let stand until set. Yield: 3 dozen.
Recipe Source : Taste of Home
Time with Grandpa

This is a picture of a friend of mine and his granddaughter. He takes great pride in being a grandpa and you can just tell by this picture she loves being just like him.
A Poem for My Grandpa
My Grandpa, you are so special to me,
You teach me to be happy and free.
I love spending our fun days together,
We always find a new adventure.
You don’t mind answering my questions “Why?”,
You pick me up and carry me high.
My Grandpa, you take the time to teach,
And let me see things above my reach.
With you, I always feel safe and secure,
I’ll love you forever, ever more.
We say goodbye with a hug and kiss,
As I make a big, big special wish…
My wish for you, Grandpa, please, please don’t go.
Why? Because I love, love, love you so….
source Nana's Corner

also shared on the blog SevenClown Circus
Chocolate Covered Peeps giveaway

What about the Shepherds

And there were shepherds living out in the fields nearby, keeping watch over their flocks at night. 9 An angel of the Lord appeared to them, and the glory of the Lord shone around them, and they were terrified. 10 But the angel said to them, “Do not be afraid. I bring you good news that will cause great joy for all the people. 11 Today in the town of David a Savior has been born to you; he is the Messiah, the Lord. 12 This will be a sign to you: You will find a baby wrapped in cloths and lying in a manger.” Luke 2:8-12
I wonder what those shepherds thought on that night as they tended to their sheep when the angels appeared and announced our Lords birth
While shepherds watched their flocks by night,
all seated on the ground;
the angel of the Lord came down,
and glory shone around,
and glory shone around.
"Fear not!" said he, for mighty dread
had seized their troubled mind.
"Glad tidings of great joy I bring
to all of humankind,
to all of humankind."
"To you, in David's town, this day
is born of David's line
a Savior, who is Christ the Lord,
and this shall be the sign,
and this shall be the sign:"
"The heavenly babe you there shall find
to human view displayed,
all meanly wrapped in swathing bands,
and in a manger laid,
and in a manger laid."
Thus spake the seraph and forthwith
appeared a shining throng
of angels praising God on high,
who thus addressed their song,
who thus addressed their song:
"All glory be to God on high,
and to the earth be peace;
good will henceforth from heaven to earth
begin and never cease,
begin and never cease!"
Nahum Tate

Wordless Wednesday : Just Like Mommy

http://itsablogparty.com/say-cheese/ Special Exposure Wednesday @ 5 minutes for special needs

Its Cold Outside Here Warm Up While You Read Some Top Post
Its a super cold 19 degrees outside and all I can say is try to stay warm. While there is not a lot one can do outside this time of year I am staying busy by creating post, visiting other blogs and yes entering great blog contest as well. What about you what is it cold where you are? If so why not take time to read a few of my blogs most read post
Vintage Ornaments
Ozone Socks
Monday Christmas Music Moves Me
Christmas Cookie 4 Way
Meet Me On Monday
Blue Christmas
Cathedral Window Christmas Cookies
A Childs Christmas Eve Dream
Free Printable Advent Ornaments
Happy Homemaker Monday December 6, 2010
Vintage Ornaments
Ozone Socks
Monday Christmas Music Moves Me
Christmas Cookie 4 Way
Meet Me On Monday
Blue Christmas
Cathedral Window Christmas Cookies
A Childs Christmas Eve Dream
Free Printable Advent Ornaments
Happy Homemaker Monday December 6, 2010
Tuesday, December 7, 2010
Channel Lock Giveaway


SnackTAXI review

Erin Kelly Dill invented SnackTAXI in 2003 as a way to limit the plastic ziplock bags that seemed to flow from their house to the landfill. I must say that we have had the same issues here. Whenever one of the nieces, nephews or grandbabies would desire a snack I would place it in a plastic bagie. With the snack taxi it is still easy for them to tote it with them and since the snackTAXI can be reused it saves money as well. The SnackTAXIs are made in home based workshop by talented local seweres. I love this because I believe that they take more pride in their work than a factory would.
Products Created by SnackTAXI include

Snack Sacks that are 6" W x 4.5" H perfect size for carrying veggie stix, chips, dry cereal


The SnackTAXI makes a perfect Christmas Present for many different individuals. Those who work or go to school and would like to save a bit of money would welcome the SnackTAXI products because they are so convient Mothers of little ones would welcome the SnackTAXI products because they are perfect for little hands to tote their snack with them and fit nicely into a diaper bag or a purse for visits out of the house as well.
You can buy SnackTAXI products at their website or see if there is a retail location near you
SnackTAXI can be found on facebook

As stated in the post we received the products that were mentioned from SnackTAXI there was no other means of compensation. The words and opinions expressed in the post are those of mine alone

sharing this post for Works for Me Wednsday @ We Are That Family because it does just that it works for me by cutting down trash, expenses and are very easy to use.
He will be called Immanuel
“The virgin will be with child and will give birth to a son, and you will call Him Immanuel, God with us.” Isaiah 7:14 (NIV)
Today in the hustle and bustle of your daily life take a moment to think about ths verse. Many years before Jesus was born isaiah had stated it how wonderful is that there always was a plan and always wll be.
Today in the hustle and bustle of your daily life take a moment to think about ths verse. Many years before Jesus was born isaiah had stated it how wonderful is that there always was a plan and always wll be.
Tacos In A Bag

UgBGk~$(KGrHqUOKj8EvYkdmuT0BL+Hz9hg3w~~_3.GIF)
•Little bags of Doritos or tortilla chips
•Taco meat
•Shredded lettuce
•Shredded cheese
•Chopped tomatoes
•Sour cream
Set out all the ingredients for the tacos in separate bowls on the kitchen table. The best part about this recipe is that there is no mess and everyone serves their selves First start with everyone having a bag of chips. They should crush the chips if they want or they can keep bigger pieces if they wish. The thing is they need to add the ingredients to their bag The next part is to enjoy you may want to offer something to stir with like a spoon.

Staples offers tips to help you stay organized

Q. As you're unpacking decorations for the holidays, what do you suggest keeping in mind when re-packing to keep you better organized?
A. First, when you're unpacking, if you see anything that you already know you won't be using, donate it to an organization, or if it's broken, dispose of it. It's all too easy to just keep mindlessly storing those things year after year. Once you have your rooms set up the way you like them, take a photo. You can store all of the accessories for one room in a box together with the photo placed inside the box to remind you how to set
it up and show you what is in the box.
Q. I gifted the same sweater to my cousin two years in a row! How do I keep myself organized so this doesn't happen again?
A. If you find it difficult to start earlier on your gift purchases this year, at least make your list so you'll have it in mind as you see things in the course of your normal day. You might be surprised how just the awareness of needing gifts brings forth more ideas. Making an early holiday gift list also means easier budgeting over time and more thought toward each gift! You can organize your gift-giving with a Gift Journal so you can track it from year-to-year, helping you remember people you need to give to that might accidentally be forgotten, like your hairdresser or the postal carrier. You can also remember what you gave someone last year so you don't accidentally duplicate or buy something at a wildly different price point. "M by Staples" leather refillable journals are beautiful and perfect for this purpose. By the way, you can also write in your journal the HIDING PLACES where you've hidden your gifts--Just don't let your kids know this book exists!
Q. What are your tips on keeping organized while holiday shopping? My car looks like I live in it!
A. First, plan your holiday shopping before going out on a series of stops, so that you save time and help the enviornment, too. To keep your car oganized while you're out and about, you can repurpose an old wallet
to use in your car's console to store frequent customer puchn cards, gift cards, and other nonessential cards you may need while shopping. File folders, such as the Staples Poly Colors Expanding Files can help you
organize gift ideas torn from catalogs or magazines, even throught the year, and provide a place for receipts. You can file the ideas per person. These expanding files are easy to keep in your home office in a file
drawer and then grab and go if you want to bring your ideas while shopping.
Q. I have a lot of guests coming to town - how do I clean and keep them occupied while I'm working during the day
A. Simple! You can create a "tourist binder" for guests with sightseeing information, coupons, "things-to-do" articles, favorite restaurants an instructions for your home's internet access. This is a great project for
kids to help with! Staples BETTER Binders are terrific for your tourist binder because they are durable and reinforced, and the tabs are slideable, making it easy to organize and label the different sections.
Q. Organizing for the holiday season can get hectic, especially with children. Do you feel that toys for the kids should be put away throughout the holidays as to not to add to the chaos?
A. I believe the pre-holiday time, anytime after Halloween, is a time of great opportunity for teaching kids some valuable lessons about giving while getting organized too. Going through their toys with them prepares
your toy storage areas to receive all of the new presents they are about to open, and it teaches them that donating is a great way to help other kids who might not have the happiest of holidays. I will never forget the
year that my son somewhat painfully gave away his wooden trains. He knew he'd outgrown them and still loved them in a way, but he wanted so much for other kids to have them instead. It was entirely his decision and it was beautiful to see. So when you go through the toys and pare them down, that helps a lot to keep them out of the way and tame the chaos too. You can also keep a basket in each room where they play often and quickly hrow toys in there to clean up, like little satellite toy box stations apart from the main playroom or bedroom.
Want more great tips and ideas you can visit http:/www.staples.com/clutterdiet
Shred The Stress with Staples
I love the holidays and all the great activities, decorations, food and so much more that they bring. One thing that I do not like is the stressful moments of life. With all the fun in the air you will nearly always see me with a smile on my face but if that smile starts looking a bit forced and turns a little side ways then you know that the stress has hit me. Among the list of items that stress me out and I would shred if possible are:

Staples® Minimate Cross-Cut Shredder can help you rid the excess bits of information that you don't want anyone to see. Features of the Minimate Cross-Cut Shredder include:
•6-sheet, light-duty, cross-cut, shreds paper, credit cards
•Cross-cut shred size: 5/32" x 1-6/32"
•Runs for 2 minutes before needing 30 minutes off for down time
•1.5-gallon bin
•Auto reverse jam resistance
•Auto start and stop
•Dimensions: 13.98"H x 7.8"W x 10.75"D
•65 decibel noise level
•1-year mfr. limited warranty
•Staples Brand 100% Satisfaction Guaranteed
Its a portable, lightweight desktop 6-fullsize sheet shredder that's small enough for the desktop but tough enough to handle credit cards, staples and paperclips. It's available in Staples retail stores and Staples.com
I created this post as an entry into a contest where I have the opportunity to win $500. I received no product or other items for creating this post.
- Children misbehaving. I have a houseful of teens so when they talk when they should be listening or do things without thinking that often that stresses me out. What used to be an Innocent child talking during service is now looked down on as inappropriate behavior
- Worrying about unexpected guest who so often pop in during the holidays, Is there enough food, covers, blankets , items that are needed. What if that person that you left off the list this year shows up for a visit and brings you a present. What are you to do then.
- All though I love to cook and bake during the holidays time sometimes becomes a stressful issue. Are things being prepared where there will be enough time? What about baking those desserts to take some where but time is running out.
Staples® Minimate Cross-Cut Shredder can help you rid the excess bits of information that you don't want anyone to see. Features of the Minimate Cross-Cut Shredder include:
•6-sheet, light-duty, cross-cut, shreds paper, credit cards
•Cross-cut shred size: 5/32" x 1-6/32"
•Runs for 2 minutes before needing 30 minutes off for down time
•1.5-gallon bin
•Auto reverse jam resistance
•Auto start and stop
•Dimensions: 13.98"H x 7.8"W x 10.75"D
•65 decibel noise level
•1-year mfr. limited warranty
•Staples Brand 100% Satisfaction Guaranteed
Its a portable, lightweight desktop 6-fullsize sheet shredder that's small enough for the desktop but tough enough to handle credit cards, staples and paperclips. It's available in Staples retail stores and Staples.com
I created this post as an entry into a contest where I have the opportunity to win $500. I received no product or other items for creating this post.
Tuesdays at the Table

Buttermilk Pie Servings: 8
1 Pillsbury All-Ready Pie Crust (uncooked place in pie plan)
2 cups sugar
1 cup low-fat buttermilk
3 Tablespoons all-purpose flour (slightly rounded)
1 teaspoon vanilla
1/2 cup margarine
3 large eggs
Pre-heat oven to 350 degrees Cream sugar and margarine. Add eggs and flour; beat well. Stir in buttermilk and vanilla. Pour into prepared pie crust. Bake for 45-50 minutes.

Christmas Cookies & Planning a Cookie Exchange
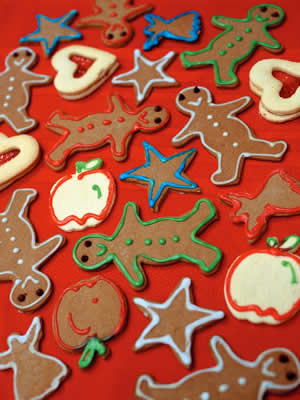
I love Christmas Cookies just like the next guy the thing that I don't like is the time it takes and money it takes to make several different kinds. That is why it is a wonderful idea to join with friends and have a cookie exchange. Each person can make one or more kinds of their favorite cookie or candy recipe and end up with several different types at the end of the get together. This is exactly what I will be doing today planning a get together for friends and some family members so that we can sit and talk and eat and share cookies to take home. Here are some great tips for planning your own cookie exchange party
10 Easy Tips for a Great Cookie Exchange
1.Ask each guest to bring either a dozen or half dozen cookies for each attendee, plus a dozen for the party.
2.Supply plastic storage bags or paper plates and foil just in case guests forget to bring a container for transporting their cookies home. Remind guests to store each cookie variety in separate containers until serving. Mixed cookie varieties lose their flavor and texture.
3.Request that participants bring copies of their recipe to share with others. That will avoid the necessity of mailing out copies at a later date after everyone inevitably requests them at the party!
4.Prepare a large table for everyone to set out their cookies. Spread a festive cloth on the table. Place one large basket, tray or plate on the table for each guest to place their contributions.
5.Place an extra platter on the table for the cookies that will be enjoyed during the party.
6.Play Christmas music throughout the gathering.
7.Even if you haven't finished your holiday decorating by the date of the party, be sure the party room has some festive decorations.
8.A cookie exchange can be held any time of the day, but mornings are a great time during the holiday season. By hosting it in the morning, your guests will have the remainder of the day for other holiday activities such as shopping, wrapping, their own decorating, or other parties.
9.Plan to serve refreshments that can be prepared in advance and merely reheated at the party. You shouldn't be cooking during this party. It's more important to keep the cookie exchange flowing. For a morning party, overnight egg casseroles work very well.
10.Serve at least one holiday beverage such as egg nog or hot mulled cider along with coffee, tea, juices and, of course, milk!
Source : Entertaining About.com
shared at 5 minutes for mom @ Tackle it Tuesday
Christmas Tree
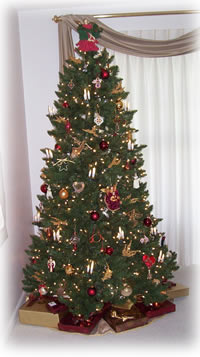
The decorated and lighted Christmas Tree came into general use in Germany during the Reformation, and symbolized the brightness, beauty, and joy of the Christmas season as a time to celebrate God's grace.
Swedish Tea Ring
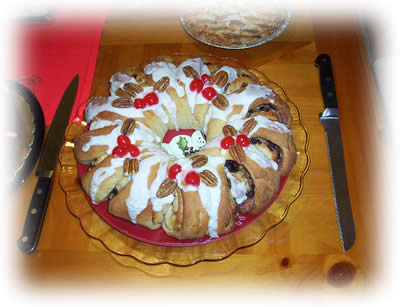
Swedish Tea Ring
1 cup chopped candied fruit
1/2 cup raisins
2/3 cup packed brown sugar
1/4 cup butter, melted
1 teaspoon grated orange peel
1/2 teaspoon ground cardamom
DOUGH:
1 package (1/4 ounce) active dry yeast
1/3 cup sugar, divided
1-1/4 cups warm water (110° to 115°), divided
2 eggs
1/4 cup shortening
1-1/2 teaspoons salt
4-1/4 to 4-3/4 cups all-purpose flour
ICING:
1 cup confectioners' sugar
1 tablespoon lemon juice
1 tablespoon milk
Candied cherries, optional
In a bowl, combine the first six ingredients. Cover and refrigerate. In a small bowl, dissolve yeast, 1/4 cup water and 1 teaspoon sugar in 1/4 cup warm water; let stand for 5 minutes. In a large bowl, combine remaining water and sugar; stir until dissolved. Add yeast mixture, eggs, shortening, salt and 3 cups flour; mix until smooth. Add enough remaining flour to form a soft dough.
Turn onto a floured surface; knead until smooth and elastic, about 6-8 minutes. Place in a greased bowl, turning once to grease top. Cover and let rise in a warm place until doubled, about 1 hour.
Punch dough down; divide in half. Roll each portion into a 16-in. x 9-in. rectangle. Sprinkle filling over dough to within 1/2 in. of edge.
Roll up jelly-roll style, starting with a long side; pinch seams to seal. Place on greased baking sheets; pinch ends together to form a ring. With a scissors, cut from outside edge two-thirds of the way toward center of ring at 1-in. intervals. Separate strips lightly; twist to allow filling to show. Cover and let rise until doubled, about 1 hour.
Bake at 350° for 20-25 minutes or until golden brown. Cool on wire racks for 20 minutes. For icing, combine the confectioners' sugar, lemon juice and milk; drizzle over tea rings while warm. Decorate with cherries if desired. Yield: 2 tea rings.

Start the Week off Right Read a few of my Most Read Post for December 5
Here are my top 10 most read post. Thanks for reading and I hope that enjoy reading I can tell you that I enjoy your visit
vintage ornaments
ozone socks giveaway 2 winners each get 2 pairs of socks
finish quantum and jet dry giveaway which has ended now
Christmas cookies 4 way
Frugal Friday post
Christmas Tree Ornament
Snowball Cookies
Pipe Cleaner and Bead Christmas Ornament
Paper Plate Snowman
Holiday Cupcake Recipe from Duncan Hines
vintage ornaments
ozone socks giveaway 2 winners each get 2 pairs of socks
finish quantum and jet dry giveaway which has ended now
Christmas cookies 4 way
Frugal Friday post
Christmas Tree Ornament
Snowball Cookies
Pipe Cleaner and Bead Christmas Ornament
Paper Plate Snowman
Holiday Cupcake Recipe from Duncan Hines
Subscribe to:
Posts (Atom)