
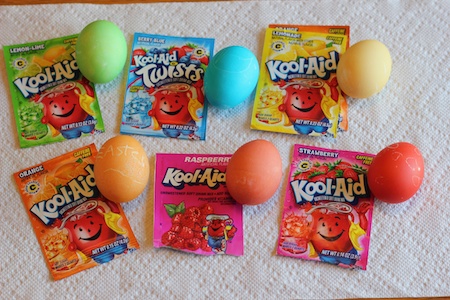
Kool-Aid Dyed Eggs:
White eggs, boiled and cooled
Kool-aid packets
1/2 cup of water for each packet of Kool-Aide
Narrow glasses
First you want to boil your eggs. You've probably boiled eggs before, but I'm going to tell you right now how to boil the perfect egg.
Gently place eggs in a pot and cover with water until there is 2 inches of water above the top of the pile of eggs. Add in two tablespoons of sea salt, cover the pot and bring eggs to a boil. As soon as the pot begins a rapid boil turn off the heat and let the pot sit for ten minutes covered.
At the end of 10 minutes gently drain the pot and cover the eggs with cool/cold water. Let eggs sit for another 5 to 10 minutes.
Remove eggs from the cool water and let them cool completely to room temperature. At least an hour. (Note: This is only for coloring eggs. If you're using the eggs to cook with once they've had the cool water bath they're ready to go, or you can store them in the fridge for up to a week.)
When you're ready to dye your Easter eggs here's what you do...
Add Kool-Aid Powders to separate glasses (see note above about glasses) and then pour 1/2 cup of water in each glass. Stir to mix.
Using a spoon gently lower eggs down in the glass. Make sure to let the spoon rest under the egg so it won't get stuck in the glass. Let the eggs sit for a few minutes, or as long as you like, until the egg reaches the desired color.
Place eggs in a carton to dry. The eggs with darken in color as they dry.
Repeat the process until all the eggs are dyed.
Store in the fridge after dying. The eggs can still be used for deviledeggs or egg salad if you don't use them to hunt.
Notes: The Kool-Aid has citric acid in it so that is why you don't need to add that or vinegar in to the glasses.
No comments:
Post a Comment
I love comments so if you have a minute leave me your thoughts on the above post