Custom Search

Tuesday, November 3, 2020

Sandwich Day


What will you be having to eat today?? I am sure that someone somewhere will be eating at least one sandwich. My son I am sure of as he makes nearly anything into a sandwich. However, did you know that November 3rd is known as sandwich day?? 


While sandwich day is not an official holiday it is however one that we should observe. Reason being that today is the day that celebrates all those tasty sandwiches. Sandwiches are not only tasty but quick as well. Since they can be made of nearly any filling sandwiches have become popular in many parts of the world. 


There is not much history to report here as the origins of this day are unknown. This day may have simply been made up by a sandwich shop trying to boost sales. The sandwich itself does have a bit of history record. It was John Montagu ,,, the Earl of Sandwich ,,, that first put meat between two slices of bread and had it recorded. Perhaps the reason it was so noted was because while he wanted a bit to eat he did not want to leave the card game he was currently playing. Thus creating a sandwich of meat placed between 2 pieces of bread. 



  • 1 pound top round steak, sliced thin
  • 1/2 tsp salt
  • 1/4 tsp pepper
  • 1 tsp garlic powder
  • 1 onion, halved and sliced
  • 2 bell peppers (any color), seeded and sliced
  • 1 Tbsp soy sauce
  • 1 Tbsp Worcestershire sauce
  • 2 Tbsp olive oil, divided
  • 8 slices provolone cheese
  • 6 French style rolls, halved lengthwise


TO MAKE FRESH:

Before starting, freeze beef for 30-45 minutes until slightly frozen. This will make it easier for you to thinly slice the beef. Cut into thin slices and set aside.
Place french rolls on an oven safe pan, cut side open. Broil until lightly toasted. Remove and set aside.
Heat a large skillet over medium high heat. Add 1 Tablespoon of oil. Once heated, add onion, peppers, soy sauce and Worcestershire. Cook, stirring occasionally, for 12-15 minutes until onions and peppers are softened and begin to brown. Remove from pan and set aside, covering to keep warm.
Heat remaining Tablespoon of oil in the pan. Add beef, salt, pepper and garlic powder. Cook, stirring frequently until meat is just cooked through. Add peppers back to the skillet and mix to combine.
Top mixture with four slices of provolone cheese. Cover with lid until cheese begins to melt.
Divide cheesesteak mixture between four sandwiches. Top each with an additional slice of cheese. Serve and enjoy!

TO ASSEMBLE FREEZER MEAL
Before starting, freeze beef for 30-45 minutes until slightly frozen. This will make it easier for you to thinly slice the beef. 
Cut into thin slices. Place in a gallon sized bag and add salt, pepper and garlic powder. 
In a separate gallon sized bag, combine bell peppers and onions. Add soy sauce and Worcestershire sauce. Seal bag.

please consider sharing our post

shared at 
avn rt ==== done

Monday, November 2, 2020

States join the Union

 In 1889 the United States welcomed 2 new states to the union. The states of North and South Dakota were formally admitted into the union. Prior to becoming states the area was simply a territory. The Territory of Dakota was an organized incorporated territory that belonged to the United States. The territory had been in existence since 1861 and nearly 30 years later became 2 separate states of their own. 


The Dakota territory was made up of the northernmost parcile of land that was acquired during the Louisiana Purchase, the Southern line was drawn up by Rupert's Land. The name of the states comes from the Sioux tribes which lived on the land at the time. In addition territories that became states prior had lost some land to the Dakota territory as well. 


Did you know that the Dakota states love the red rooted stalky plant known as Rhubarb. In fact it is one of the early signs of spring that everyone looks for. Everyone it seems has their own rhubarb recipe and if they don't they can find them in recipe books, family recipe files, magazines, newspapers, television and radio talk shows. In addition there are community celebrations that take place to honor the vegetable or fruit known as rhubarb. If you are looking for some tasty rhubarb recipes then simply visit this link where many have been shared. 


Rhubarb seems to flourish in the Dakotas and one reason is that the area is ideal for its growth. Rhubarb grows well in harsh temperatures and where the soil freezes in the winter and stays well below 40 degrees or colder. 

Please consider sharing our post


post has been shared at


Sunday, November 1, 2020

Welcome to November and a Great Reason not to Shave

 November is the ninth month of the 12 month calendar year. The name of this month reflects the latin name of the month, Novem. Novem in Latin means "nine". On the Roman calendar November was the ninth month of the year. The country Finland refers to November as "the Month of the Dead" However, both the United States and Canada lends even a different meanting to the moth of november.


The United States and Canada offer a generous relief in the month of November as "no shave November and the chance to grow a beard and raise money for cancer awareness occurs. Many cancer patients will lose their hair due to the treatment that they undergo. By allowing others a chance to grow their hair as they wish while earning money for great a cause. Thus the money that would be used to spend on shaving and grooming as well as money earned by gathering from friends and family to join in on the fun watching your looks change as well as sharing a bit of information that may just be life saving. Find out more information https://no-shave.org/ 


Did you also know:

November's birthstone is Topaz and is the symbol of friendship. The orange-yellow color is the most popular among the precious stone but there are other shades as well. 


Novembers birth flower is the chrysanthemum. The golden flower is often thought of as honesty, joy and optimism. 


November plays host to Scorpio and Sagittarius. The two astrology signs are led by Scorpio which takes place from the 1st of November to the 21st of November. After that births that occur from the 22nd of the month to the end of the month are carried by the sign Sagittarius. 


Please consider sharing our post


This post has been shared at
avn -- rt === done 

Thursday, October 29, 2020

Cool Weather Recipe ::: Cabbage Rolls

One dish that I love to fix in the fall / winter colder weather is cabbage rolls. Not all cabbage rolls are the same. Likewise there are many different ways to cook them and the chef may choose from beef, pork or lamb. Seasonings used often include ginger, cinnamon and nutmeg making it a delight to smell as they cook as well. 


Tips for Making Cabbage Rolls: 

  • Purchase the biggest head of cabbage
  • Cabbage that has leaves that are a bit loose works better than one that the leaves are tighter 
  •  If the cabbage has dark green leaves on the outside will work better 
  • If there are no large heads of cabbage available then purchase 2 heads in order to have enough larger outer leaves


For the cabbage rolls:

  • 16-18 large cabbage leaves
  • 2 tablespoons vegetable oil
  • 1 1/2 pounds lean ground beef
  • 1 cup cooked rice
  • 1 large onion, chopped
  • 1 clove garlic, minced
  • 1/2 teaspoon crushed red pepper flakes
  • 1 teaspoon salt
  • 1 teaspoon pepper
  • 1 large egg, lightly beaten
  • 1/2 cup milk

For the sauce:

  • 1 15-ounce can tomato sauce
  • 1 15-ounce can diced tomatoes (do not drain)
  • 1/4 cup light brown sugar
  • 1/4 cup white balsamic vinegar
  • 1/4 cup water
  • 2 tablespoons cornstarch mixed with 1/4 cup water
  • 1/4 cup chopped parsley leaves for garnish


To prepare the cabbage rolls:

  • Heat a large pot of salted water over high heat until boiling. Drop the cabbage leaves, a few at a time, into the boiling water. Cover and cook for about 3 minutes or until wilted and pliable. Remove with tongs to a strainer to drain. Repeat until all leaves are par-boiled. Remove the thick central ribs by cutting along both sides of the rib in a long narrow triangle. Discard ribs. Set leaves aside. (SEE NOTES  BELOW)
  • Heat oil in a large ovenproof skillet (or Dutch oven) over medium-high heat until shimmering. Add the onion and cook until starting to caramelize, about 5 minutes. Add the garlic and crushed red pepper flakes and sauté for 30-seconds. Remove the skillet from the heat. Transfer half the onion to a large mixing bowl.
  • Off heat, add the ground beef, cooked rice, salt, pepper, egg and milk to the remaining onion mixture in the skillet. Stir with a wooden spoon to combine. Divide the ground beef and rice mixture evenly between the 16 cabbage leaves. Overlap the cut ends of the cabbage to prevent the filling from spilling out. Place the filling over the area that overlaps and fold in the sides. Roll the leaf tightly around the filling to create a tidy roll. Place the cabbage roll, seam side down, in the now empty skillet, Dutch oven or baking dish. Repeat until all filling is used.

To prepare the sauce:

  • In the mixing bowl with the remaining onions, add the tomato sauce, diced tomatoes, brown sugar, vinegar and water. Pour over the cabbage rolls. Cover the skillet with a lid or foil and bake until the sauce is bubbling and the rolls are heated through, about 45 minutes. Remove the lid and spoon some of the sauce over the cabbage rolls. Continue to bake, uncovered, for an additional 15 minutes.
  • Carefully remove the cabbage rolls to a serving plate. Put the skillet with the sauce on the stove top and heat on medium. Whisk together the cornstarch and water and slowly add to the sauce in the skillet. Heat until thickened. Pour the tomato sauce over the cabbage rolls and serve immediately garnished with parsley. (recipe resource )
please consider sharing our post


shared at 

Monday, October 26, 2020

Have you Minced the Meat

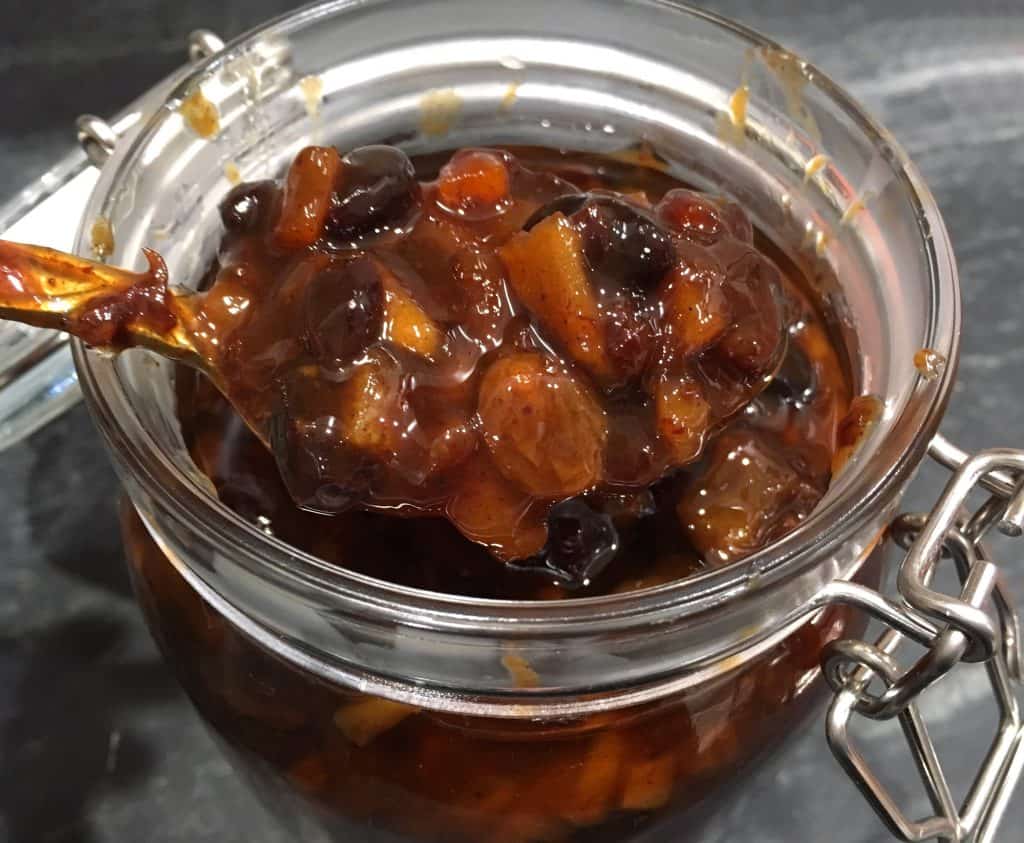
 Pumpkin Spice can be found nearly every where right now and soon the holidays will be brimming with all types of desserts and pies. My daddy simply loved pie and would take a slice over cake any day. One of his favorite types of pie was mincemeat. Have you ever had a piece of mincemeat pie?? Perhaps you have never heard of what mincemeat. 


In medieval days refrigeration had not been invented so when the great hunts would happen a way to preserve the food would be needed. One way to preserve meat was to turn it into mincemeat. There was no salting or smoking needed. The meat was mixed with fruit and spices and enjoyed in a savory manner. Eventually the British would catch onto the fact that you could enjoy a pie of mincemeat simply by increasing the fruit and spices and making the mixture a bit sweeter. 


Mincemeat pies have changed over the years and often do not include the grand amount of meat that they once did. Here are some vintage recipes that will allow you to try your own mincemeat pie 


Mincemeat Pie

1 pkg (9 oz) None Such Condensed Mince Meat
1-1/2 cups water
1 to 3 tablespoons sugar
Pastry for 2-crust pie

In small saucepan, crumble mince meat; add water and sugar. Cook and stir over medium heat until lumps are thoroughly broken. Boil one minute. Cool. Line 8-inch pie plate with pastry; fill with mince meat mixture. Cover with top crust. Flute edges. Cut 4 gashes in center of top crust. Bake at 425° for 30 minutes or until golden brown.
For a 9 inch pie, use two (9 oz.) packages condensed mince meat, 3 cups of water and 2 to 6 tablespoons of sugar.)


PRIZE COOKIES
(Makes 5 dozen 3-inch cookies)

1 cup shortening
1-1/2 cups sugar
3 eggs, well beaten
1 pkg (9 oz.) None Such Condensed Mince Meat
3-1/4 cups sifted all-purpose flour
1 teaspoon baking soda
1/2 teaspoon salt

In large bowl, cream shortening. Gradually add sugar, blending well after each addition. Add eggs and beat until smooth. Sift together flour, soda and salt. Gradually add to creamed mixture. Crumble and stir in mince meat. Drop mixture by teaspoonfuls onto greased baking sheets, about 2 inches apart. Bake at 400° for 12 minutes or until lightly browned.

find many great vintage recipes at 
recipe curio. 


please consider sharing our post

this post has been shared at

Show a Bit of Appreciation

Pastor appreciation is something that should be normal and understood. The bible tells that we are to respect the preacher as he is the Leader of our church. The bible verse 1 Thessalonians 5:12-13 tells us that as a pastor he is as a "shepherd" in God's own flock.


So how should we show our appreciation?? Well there are many ways How do you show another you appreciate them. What ever it is that you do to show respect then this should be an example of how to show appreciation to the pastor. In any form oral, written, sharing your special talent such as cooking or writing, or how about just taking him or her out for a meal. Showering a bit of extra respect and appreciation can be as simple or as elegant as you wish it. However, one of the best ways to share your appreciation is to follow the words of the bible God's Holy word. 


please consider sharing


Thursday, October 22, 2020

Pickled Peppers #recipe


  • 6 pounds of hot peppers (we used hot Hungarian wax peppers)
  • 12 cups cider vinegar
  • 4 cups water
  • 6 cloves of garlic, peeled and smashed with the flat side of a chef’s knife


Wash the jars in the dishwasher.

While the jars are washing, prepare the peppers.  First, put on a pair of rubber or plastic gloves – if you don’t you’ll regret it (your skin will become dry, red and burned from the peppers’ oil, and the oil will linger on your skin no matter how well you wash afterwards, and they you will inevitable touch your eye and be in a lot of pain.  A LOT.  Wear the gloves).  Rinse the peppers under cold running water.  Cut off and discard the stem, then slice the peppers into rings.  For hot peppers, keep the white membrane and the seeds (even if they fall out when cutting, keep them in the mix of pepper rings and use them when you fill the jars – the membranes and seeds are where most of the heat lives).  Transfer pepper rings and any dislodged membranes and seeds to a large bowl.

Also, while the jars are washing, prep your canning area.  I like to put down old (clean) kitchen towels and hot pads so I don’t have to worry about scorching the counter.  Get your jar lifter, lid wand, ladle, rings, lids, and wide mouth funnel ready.  I use a chopstick to remove air bubbles, but you can also use a small plastic spatula or plastic spoon (just don’t use a metal utensil, which can scratch and/or crack your jars).

Remove hot jars from dishwasher, place inside canner and fill the canner with hot water so that all of the jars are full and covered by 1 inch of water.  Put the canner on your largest burner and bring the water to a boil.

Bring a small pot of water to a simmer.  Add the lids to the simmering water; do not boil the lids.

Combine the vinegar, water and garlic in a large pot and bring to a boil.

Remove the pots of simmering lids and brine from the stove and place on hot pads near your jar filling station.  Remove garlic cloves from brine and discard.  Place the pepper rings near your filling station.  Have the canning tools listed in step 3 handy.

Remove 1 jar from the canning pot and dump out the water.  Pack the pepper rings (and any loose membranes/seeds) into the jar. Place the jar on the counter, place the funnel on top of the jar and ladle in the hot brine, leaving 1/4 inch headspace at the top of the jar. Take the funnel off of the jar and use a chopstick to remove the air bubbles; add more brine if needed to maintain 1/4 inch of headspace after the jar is de-bubbled.  Wipe the rim of the jar with a damp paper towel.  Use the lid wand to remove 1 lid from the pot and place it on top of the jar.  Screw the ring onto the jar until it is finger-tip tight (you don’t want it to be too tight or the air won’t be able to escape during processing).  Repeat with each jar until all of the jars are full.

Return the jars to the boiling water in the canner.  The water should cover the jars by at least 1 inch. Place the lid on the canner and process at a full boil for 10 minutes. Remove the jars from the canner and place on a towel on the counter.  Do not disturb the jars while they cool.

Label the sealed jars and store in a cool, dry place for up to 1 year.  If any of the lids fail to seal, the unsealed jars should be refrigerated because they are not shelf stable.


Please consider sharing our post 

Wednesday, October 21, 2020

History of Cinnamon Trade and a Delightful Fall #Recipe


More than likely you have heard of the spice known as cinnamon. It is one of my favorite fall spices but can be used in many other recipes through out the year as well. Cinnamon comes from the inner bark of several trees that come from the family known as cinnamomum. 


The spice cinnamon is used from everything from aromatics and flavorings to cuisines, sweet and savory dishes, breakfast cereals, snacks, tea and other great foods that are in our cabinets and fridges. 


The spice cinnamon has a rich history being first imported to Egypt . Many believe that it first came from China... this would be wrong as cinnamon cassia was shipped from China but no the common day cinnamon that we are common to. However, it is true that most modern era cinnamon are native to Vietnam, Indonesia and other Asian countries that host warm climates. 


Throughout the years cinnamon has also been used to embalm mummies, for aromatic burnings, and gifts to ancient rulers The desire to have control of the cinnamon spice trade led to the Dutch establishing a trading post during the early 1600's. The British would later take control from the Dutch in 1796. However, as early as 2017 the top exporting countries were  Indonesia, China, Vietnam and Sri Lanka. Global production has multiplied more than ten-fold since 1970. 


1 cup unsalted butter softened (2 sticks)
1 cup packed brown sugar
1/2 cup granulated sugar
1 large egg
1 tablespoon unsulphured molasses
2 teaspoons vanilla extract
1 teaspoon lemon juice (optional)
Dry Ingredients
1 1/2 cups all-purpose flour
1 teaspoon baking soda
2 teaspoons ground cinnamon
1/2 tsp. EACH salt, ground ginger
1/4 tsp. EACH ground cloves, ground nutmeg
2 1/4 cups uncooked whole-rolled oats
1 cup finely chopped peeled Granny Smith apples (1/4” pieces)
3/4 cup chopped walnuts (may sub ½ cup oats)
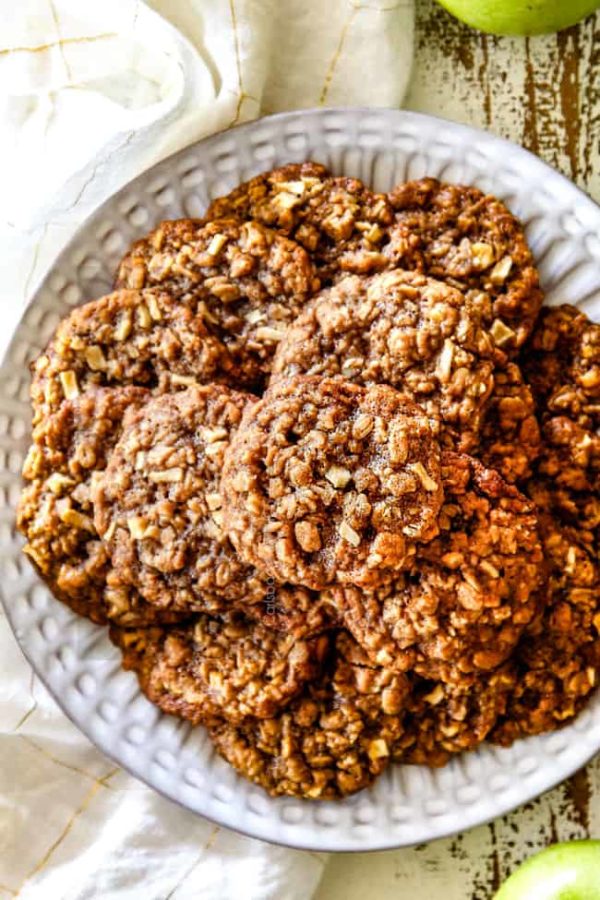
top view of apple oatmeal cookies o a white plate late

In a medium-sized bowl, add all of the dry ingredients except rolled oats and whisk to combine. Add oats and whisk together.
With the mixer running on low, slowly add the dry ingredients to wet ingredients. The dough will be quite thick and you will have to finish mixing with a wooden spoon. Add apples and walnuts and mix until combined. Cover tightly and chill dough for at least 4 hours.
Preheat oven to 350°F degrees. Line a cookie sheet with parchment paper or nonstick baking mat. Drop dough by rounded tablespoonfuls, 3 inches apart, onto prepared cookie sheet, 8 to a sheet (keep remaining cookie dough in the refrigerator).
Bake at 350°F for 11-15 minutes or until golden around the edges and center is just set. Let stand for 3 minutes before removing to wire racks. Store cooled cookies in an airtight container.


please consider sharing this post


I shared this post at these spots 
grandmas recipes