Custom Search

Friday, September 2, 2016

Chicken Kebabs


School has started nearly every where and if it has not it most likely will be soon. Every year the same sadness but readiness feelings come over me. The fun days of summer where we could plan a day off is gone and the routine of school begins. It is also a bit sad as they grow through the years. So proud of my kids and grand-kids for doing all that they do. 

The weather here is still hot and some days are hotter than others. With the heat still here grilling is still the choice of cooking. .This recipe allows the chicken to stay moist by using a bacon puree. Oh yes that is what I said bacon and puree right next to each other. The kebabs are flavored with paprika and an easy bbq sauce. 


BBQ Chicken Kebabs
Cooks Illustrated

*THE RECIPE CALLS FOR EITHER CHICKEN THIGHS OR BREAST. IF YOU USE BOTH, MAKE SURE TO PUT THEM ON SEPARATE SKEWERS AS THEY WILL COOK AT DIFFERENT RATES.

INGREDIENTS

  • Sauce
  • 1/2cup ketchup
  • 1/4cup light or mild molasses
  • 2tablespoons grated onion (see note)
  • 2tablespoons Worcestershire sauce
  • 2tablespoons Dijon mustard
  • 2tablespoons cider vinegar
  • 1tablespoon light brown sugar
  • Kebabs
  • 2pounds boneless, skinless chicken thighs or breasts, trimmed of excess fat and cut into 1-inch cubes 
  • 2teaspoons kosher salt
  • 2tablespoons sweet paprika
  • 4teaspoons sugar
  • 2teaspoons smoked paprika
  • 2slices bacon , cut into 1/2-inch pieces
  • 412-inch metal skewers

INSTRUCTIONS

  1. 1. FOR THE SAUCE: Bring all ingredients to simmer in small saucepan over medium heat; cook, stirring occasionally, until sauce reaches ketchup-like consistency and is reduced to about 1 cup, 5 to 7 minutes. Transfer 1/2 cup sauce to small bowl and set aside remaining sauce to serve with cooked chicken.
  2. 2. FOR THE KEBABS: Toss chicken and salt in large bowl; cover with plastic wrap and refrigerate for at least 30 minutes and up to 1 hour.
  3. 3. Turn all burners to high, close lid, and heat grill until hot, about 15 minutes. Scrape cooking grate clean with grill brush. Leave primary burner on high and turn off other burner(s).
  4. 4. While grill heats, pat chicken dry with paper towels. Combine sweet paprika, sugar, and smoked paprika in small bowl. Process bacon in food processor until smooth paste forms, 30 to 45 seconds, scraping down bowl twice during processing. Add bacon paste and spice mixture to chicken; mix with hands or rubber spatula until ingredients are thoroughly blended and chicken is completely coated. Thread meat onto skewers, rolling or folding meat as necessary to maintain 1-inch cubes.
  5. 5. Place kebabs over primary burner and grill, covered, turning one-quarter turn every 2 to 2 1/2 minutes until well browned and slightly charred, 8 minutes for breasts or 10 minutes for thighs. (If flare-ups occur, slide kebabs to cool side of grill until fire dies down.) Brush top surface of kebabs with ¼ cup sauce; flip and cook until sauce is brown in spots, about 1 minute. Brush second side with remaining ¼ cup sauce; flip and continue to cook until brown in spots and instant-read thermometer inserted in center of meat registers 160 degrees for breasts and 175 degrees for thighs, about 1 minute longer. Remove kebabs from grill and let rest for 5 minutes. Serve, passing reserved barbecue sauce separately.

Cheesecake


Cheesecake
Food Network and My Kitchen Cafe

Ingredients
Crust:
3 cups finely ground graham crackers (about 40 squares)
2 tbsp. sugar
1 stick unsalted butter, melted


Filling:
1 pound cream cheese, 2 (8-ounce) blocks, softened
3 eggs
1 cup sugar
1 pint sour cream
1 lemon, zested
1 tsp vanilla extract

To prepare crumb crust: In a mixing bowl, combine the crust ingredients together with a fork until evenly moistened. Lightly coat the bottom and sides of a 9-inch springform pan (I used a 10-inch springform pan)with non-stick cooking spray. Firmly press the mixture over the bottom and 1-inch up the sides on the pan, use your fingers or the smooth bottom of a glass. Refrigerate the crust while preparing the filling.
To prepare filling: In a large bowl, beat the cream cheese on low speed for 1 minute just until smooth and free of any lumps. Gradually add the sugar and beat until creamy, 1 to 2 minutes. Periodically scrape down the sides of the bowl and the beaters. Add the eggs, 1 at a time, and continue to slowly beat until combined. Stir in the vanilla and lemon zest. Blend in the sour cream. The batter should be well mixed but not overbeaten. Overbeating incorporates too much air and will cause the cake to puff when baking, then fall and crack when cooling. Pour filling into the crust-lined pan and smooth the top with a spatula.
Bake in a preheated 325 degree oven for 50-55 minutes. The cheesecake should still jiggle slightly, it will firm up after chilling. Be careful not to overcook! Do not do a toothpick test in the cake’s center, this will make a crack. Loosen the cheesecake from the sides of the pan by running a thin metal spatula around the inside rim. Let cool in the pan for 30 minutes. Chill in the refrigerator, loosely covered, for at least 4 hours to set up. Demold and transfer to a cake plate. Slice the cheesecake with a thin, nonserrated knife that has been dipped in hot water and wiped dry after each cut.

Thursday, September 1, 2016

Sweet and Easy Cornbread

September the 1st means a couple of things, tommorow is my grand-daughters birthday and fall will soon be here. Both call for celebrations and I am willing to celebrate by enjoying my day and getting in the kitchen. This recipe offers all those that like a sweeter cornbread exactly what they are looking for. Often cornbread ends up being dry, crumbly and perfect for beans but not exactly what I want to serve alone.


Sweet and Easy Cornbread


1 yellow cake mix
2 Jiffy cornbread mixes
Oil, milk, and eggs according to package directions

Preheat oven according to directions on cake mix box. Combine cake mix and cornbread mixes in a large bowl. Add eggs, oil, and milk according to package directions (replace all water with milk). Mix together according to cake mix directions.


Bake according to directions on cake mix. Usually around 20 minutes for the muffins and 30 for the cake. If you find that it is not done in the center and browning too quickly, cover with foil and keep cooking until middle is done.


*This makes a lot of cornbread and since I don't really like using half a cake mix I usually just make it all and freeze the leftovers. You can either do 24 muffins, 12 muffins and a 9 x13 or a 9x13 and 8x8 pan. *

Lasagna Rolls


3.5 cups Ricotta cheese
2 cups mozzarella cheese
1 egg
2.5 teaspoons italian seasoning
2.5 cups frozen spinach (thawed and drained)
1 box of lasagna noodles (cooked so you don't have any trouble rolling them)
1 large can tomato sauce
1 can diced tomato
1 can tomato paste
seasoning to taste
garlic

Now that you've had a chance to get your ingredients all together, let's start building our rolls.  This is really easy and not super messy so it's a great way to get the kids involved in helping out in the kitchen.  My 10 year old daughter loves to get in the kitchen and help out so I have her measure out ingredients, mix everything and help spread the filling onto the noodles and then the best and most fun part, I love to have her help me roll them.  I'm not only spending good, quality time with her but I'm also teaching her valuable life skills that she'll need when she's older to take care of herself and a family later on.

The first thing I do is get my sauce going on the stove.  Take your can of tomato sauce, diced tomato and tomato paste along with whatever seasoning you like to flavor your pasta sauce.  I generally reach for just good old Italian seasoning and fresh garlic.  I also add a sprinkle of sugar to make it a bit less acidic.  Once that's started, I move on to assembling my filling.

For the filling, you'll take your ricotta, mozzarella, egg, Italian seasoning and if you choose to add spinach you'll add it here as well.  I usually add spinach just because it's a great way to get some greens in without hearing any complaining because you can't hardly taste it!
While you are assembling your filling, now's a good time to boil the noodles so you can roll them without breaking them...you can't really roll a hard lasagna noodle ;)

Take all of your ingredients and combine them into one mixing bowl, make sure everything gets really thoroughly incorporated.  Once you've mixed everything together you just have to spread it out on the noodles, roll them and place them in your casserole dish.

I always put a layer of sauce on the bottom of my casserole dish to help insure the noodles don't stick to the dish.  Then I lay the rolls in the dish, cover with more sauce, sprinkle mozzarella over the top and if you want you can add fresh grated Parmesan cheese on top before you cover it and slide it in the oven.  I cook this for about 45 minutes on 375 and take the foil off at about 35 minutes and let the cheese get nice and golden and bubbly for the last 10 minutes in the oven.


Cooler Days of September Perfect for winter prep

Welcome September!!! September to me is both a month to enjoy with warm-hot temps at the beginning of the month and progressively getting cooler as the month goes on. September is also a month to prepare for winter like the little ant. You may want to put together a winter emergency kit. In my kit I include:

Kerosene Oil Lamps as they offer great light and more than a simple flash light. 


Flash lights should be kept in easy to find places If the power goes out the street lights go out as well. If you live in the country then it is even darker. Batteries should be tested periodically as well. 

Extra batteries for flash lights as well as any device that you may need them for. Everything from tools that are needed in a time of emergency or games for kids take batteries. 


September is a great time to wash winter linens including extra blankets that should be readyin case the heat and electricity goes out Its also a great time to test the electric blankets and heating pads that come in handy in winter. 

Our home is an older house and there are lots of cracks and crevices. Small room heaters come in handy. September is a great time to locate and clean the heaters if needed. 


Season change means its time to change the clothing style as well. Pull the winter clothe out of storage and get them ready to wear. You may need new pieces if children have grown Have pieces wore out?? Time to replace them is now. Check out the thrift store for great deals on winter clothing in warm weather. 

Stock up on cold and flu medicine before it is needed. Use an inventory sheet to keep track of what you all ready have on hand and what you need. Remember to check expiration dates. My daughter likes herbal remedies perhaps you are as well. Do a bit of research and see what you can find that you like


September with the cooler days is a great time to make up a batch of your favorite soup and freeze it. Keep your eyes open for any sales that they have on soup in the coming months as well. Soup is great to keep on hand and makes you feel better with winter colds and blah.

 She has no fear of winter for her household, 
for everyone has warm clothes. (NLT)

What do you do to prepare for fall and winter months?? 

Recipe Haiku


open jar
heat in microwave
lazy she


slice apples
bake in phyllo dough
autumn crisp


orville's bag
three minutes on high
popcorn time


dark roast brew
plus chocolate splash
writer's high

originally posted here

Pumpkin Fritters

Today was a wonderful day to get out there. Temps are down a bit and the day is lovely. When I went to the stores I saw all the awesome fall and harvest time items available to purchase. I just simply can not wait til fall is here. The pumpkin flavor is delicious. You do not have to wait if you make up these pumpkin fritters, welcome fall in with delight.


•one 15-ounce can pumpkin
•¼ teaspoon salt
•1 cup flour
•2 tablespoons butter
•1 egg, beaten
•2 tablespoons vegetable oil
•3 tablespoons sugar
•½ teaspoon ground cinnamon
•1 teaspoon baking powder
•1 teaspoon cinnamon
•MAPLE WHIPPED CREAM
•maple whipped cream
•½ pint heavy whipping cream
•2 tablespoons pure maple syrup
•combine the maple syrup and heavy cream in a mixing bowl and mix on high until stiff peaks form
•a hint for making real whipped cream is to put the mixing bowl in the freezer for a few minutes before you start mixing
Instructions
1.In large bowl, combine pumpkin, flour, egg, 1 tablespoon sugar, baking powder and salt.'
2.Heat 1 tablespoon butter and 1 tablespoon oil in a large skillet over medium heat.
3.Drop spoonfuls of mixture into pan and lightly flatten with a spatula.
4.Cook until golden, about 4 minutes per side.
5.Cook in two batches
6.In small bowl, combine remaining sugar with cinnamon and sprinkle over hot fritters before serving

Wednesday, August 31, 2016

The heat in our area has been rough, with everyone stating how hot it is. We have yet to acquire an a/c hoping that we will be able to make it through the summer without one. School has started again and often that means that summer will be ending soon. All I know is that the heat did not get the memo. That leaves the desire for cool meals and easy lunchbox meals. 


Individual Seven-Layer Dips


Makes about 8 individual dips

1 (16 ounce) can refried beans
1 (1 ounce) package taco seasoning
1 cup guacamole
1 (8 ounce) container sour cream
1 cup chunky salsa or pico de gallo
1 cup shredded cheddar or Mexican blend cheese
2 Roma tomatoes, diced
1/2 bunch of green onions, sliced
1 (2.25 ounce) can of sliced olives, drained
9 ounce plastic tumblers
tortilla chips


In a small bowl mix taco seasoning with refried beans. Some people prefer to mix their taco seasoning with the sour cream layer but I wanted a bright white layer so I did it with the beans.

Here's how the layers are assembled:
Layer 1: beans and taco seasoning
Layer 2: sour cream
Layer 3: guacamole
Layer 4: salsa or pico de gallo
Layer 5: cheese
Layer 6: tomatoes
Layer 7: green onions and olives

In each plastic glass, layer about 2 Tablespoons of the beans, followed by 2 Tablespoons of sour cream, 2 Tablespoons of guacamole, 2 Tablespoons of salsa or pico de gallo, and 2 Tablespoons of cheese. Make sure you drain your salsa or pico to get the excess liquid out before you pour it on. Then top with about 1-2 teaspoons of tomatoes, olives, and green onion (If making ahead of time, wait to add these toppings until shortly before serving).

Garnish with one tortilla chip. Store in the refrigerator until serving and serve with chips. Makes around 8 individual dips.

The Chocolate Factory


One of the sweetest places you may find is not only located in Illinois but also right here in the forest. The Chocolate Factory offers sweets that are sugar free or full of sugar, sweets for holidays or every day, and sweets that are custom made for you. Live close by you can stop in for a bit of ice cream but if you live farther away they have an online order form and will send your choice of chocolate home to you.


Look how precious these scarecrow look. All made out of chocolate and so delicious. Where would you start with a bit of his hat or foot?? It makes no difference all is made tasty. Don't worry as chocolate helps fight tooth decay. An extract of cocoa has been found to be more effective than flouride.


So if you are in Southern Illinois stop by for a visit at The Chocolate Factory on Illinois Route 146 Trail of Tears in Shawnee National Forest. It is across from Dixon Springs State Park and a short drive from Lake Glendale Recreations Area.

Not in the area visit their website The Chocolate Factory and find them on face book as well. As always you can find us on facebook at Annies Home


Tuesday, August 30, 2016

SlowCooker Hawaiian Chicken (Freezer Recipe)

This recipe is both a slow cooker recipe as well as one that can be frozen easily.


1lb boneless, skinless chicken breasts, cut into bite-sized pieces
1 fresh pineapple, stalk, skin, and core removed and fruit cut into bite-sized pieces
2 tablespoons light brown sugar
2 tablespoons low sodium soysauce
1 gallon-sized plastic freezer bag
  1. Label your freezer bag.
  2. To your freezer bag, add pineapple, brown sugar, soy sauce, and chicken breasts. (Add the chicken breasts to the bag last) 
  3. Remove as much air from the freezer bag as possible, seal, and lay flat in your freezer.

Cook

  1. The night before cooking, move frozen bag to your refrigerator to thaw.
  2. The morning of cooking, pour contents of freezer bag into your slow cooker and cook on “low” setting for 3-6 hours, or until chicken is cooked through and tender.
shared at 

Monday, August 29, 2016

Win a Prize Pack from Entenmans


Its back to school and for many that means morning wake-up calls. Why is it I say that, because for many later wake=ups are simply part of summer time. Now that earlier times are back breakfast time has become shorter and sometimes it is great to have breakfast on the go. Would it not be great if someone would be kind enough to give us a great breakfast idea?? Well, entenmans has many and you may just want to try them out. Currently the blog Heck of a Bunch is hosting giveaway where  you can win all in the picture above. Want a chance to win the prize in the picture above?

Time To Play With The ABC's

I have shared many times that I love to teach my children through play. The ABC's is no different. Maybe you have taken the time to sing the ABC song with your child. In this post you may get a few more ideas.

Enjoy a bowl of alphabet soup and take a turn sharing each letter before eating every bite. After all it will provide a great conversation while eating. 


I recently saw a set of print blocks with the alphabet on it at the local dollar store. You may want to see if you can purchase some. One way of learning is to have it in their environment. Allow them to play with the stamps while they learn the letters.


Art is a great way to learn the alphabet through apple prints, aluminum foil, alphabet pasta, or foam shapes


B - beans, beads, bubble wrap, buttons, 
C - cotton balls, corn kernels, cinnamon (ground), coffee (ground), car stickers, construction paper (torn)
D - dirt, dots (stickers or do-a-dot markers), daisy petals, foam dinosaur shapes
E - egg shells, foam egg shapes, envelope strips, eyes (wiggly), earth stickers
F - feathers, foam, puffy finger paint, flower petals, fruit loops, flower stickers or stamps
G - glitter, grass, glue (dried out glue is raised), gems, ginger (ground)
H - hay, hair heart stickers or stamps
I - ice cube prints, ivy, ice cream stickers
J - jelly beans, jewels
K - kool-aid, kleenex, old or plastic keys, kite stickers
L - leaves, lasagna noodles, lace
M - macaroni, m&m's, mini marshmallows, play money
N - noodles, netting fabric, number stickers/stamps, nickles (play money, stickers or stamps)
O - oatmeal, owl feathers (brown feathers will do) cheerios (o shape)
P - pasta, pom-pom balls, play-doh, popcorn, pipe cleaners, penguin stickers, paper (torn), pumpkin seeds, pennies (play money, stickers or stamps),  packing peanuts
Q - q-tips, quarters stamped in paint, quilted fabric
R - rainbow colored rice, ribbon
S - seeds, sand, sequins, sprinkles, stickers, stamps, shapes, snowballs (cotton), spaghetti (cooked), string, shells, sponge paint
T -  twigs, tissue paper
U - uniform (fabric pieces in a plaid design), umbrella stickers, unicorn stickers
V - vegetable prints, velcro, velvet, vehicle stickers
W - wagon wheel pasta, wooden sticks, watermelon seeds
X - x's from alphabet pasta, bones stamped in white paint (x-ray) dirt or tape (for x marks the spot)
Y - yellow yarn
Z - zeros (cheerios), zippers (fabric), zig zags (cut from paper)

original idea found here

whats for dinner

Perfect for Tailgating : Peanut Butter Brownies


1 package Brownie Mix or your own recipe for fudgy brownies
Water, oil and eggs called for on brownie mix package (for cake-like brownies)
1½ cups confectioners' sugar
⅓ cup creamy peanut butter
¼ cup plus 2 tablespoons rice milk
3 tablespoons softened butter, divided
⅓ cup semi-sweet chocolate chips

Preheat oven to 350°F. Grease 13x9-inch baking pan. Combine brownie mix, water, oil and eggs in large bowl with wooden spoon until blended. Spread into prepared pan.
Bake 21 to 23 minutes or until toothpick inserted 1-inch from edge comes out clean.
Cool 10 minutes on wire rack.
Combine confectioner’s sugar, peanut butter, milk and 2 tablespoons butter in medium bowl.
Beat with an electric mixer at medium speed 2 minutes or until light and fluffy.
Spread evenly over warm brownies.
Place chocolate chips and remaining 1 tablespoon butter in microwave-safe bowl.
Microwave on High 1 minute or until melted; stir until smooth.
Drizzle over peanut butter. Chill in refrigerator until chocolate is set.
Eat and enjoy.

recipe source: Duncan Hines

shared at
inspire me monday

Sunday, August 28, 2016

Safe Way To Have Fun At Amusement Park


This summer there were many reports of individuals that were hurt or had family members hurt on amusement park rides. While I am not a love of amusement park rides I do have family members including my grand-babies that do love them. So to be ready I did a bit of research and located a few safety tips I thought I would share here with you.


Pay attention to the recommended age, height, weight and health restrictions. While these are often over looked they are there for a reason which is to keep you safe. These restrictions should be obeyed


If it is a ride that you have not seen before then take a moment to watch the ride and before going on it. This way you will know what to expect while riding. In most cases you can follow this step while standing in line to get your turn


Ask questions if something seems wrong to you. Do not be afraid or assume you know why something happened as it may be a matter of safety. Be sure that you are strapped in properly as well
While it may be fun to have your hands up in the air the safest way to ride the rides is to keep your had, hands, legs, arms and feet inside the ride at all times. Keep your safety belt , lap bars, shoulder harness on during the ride. Finally when exiting the ride follow the directions the ride controller is offering. 


Have fun out there riding all the great amusement ride. Take your time riding the rides and take breaks between them. I know you are excited to be at the amusement park but its better to be safe and have great time than to be part of the evening news. 

Remembering Old Friends and Love for Social Networks

 There are friends of mine that I have not seen for over 10 years but they would still say that they are my friend and be there if I needed them. The memories we have are as live today as they were yesterday. Social networks also help to keep our friendship alive. 


Today at work one of my co-workers was talking about getting a friend request from someone she had worked with many years ago. They had not seen each other in several years and she was very surprised to get the friend request. I believe that is why I love social media it not only helps get the message out there but also re-connects others as well. 

While Friendships are great when you are able to visit together they are as sweet when you have a friend to talk to daily on your own time. Someone to share your every day moments with as well as someone who will be there when tragic hits at home as well. Family, friends, co-workers and social media friends help me to be who I am. So make that call and find that friend that you have not seen forever or perhaps it is someone who you know personally that is in your every day life. Everyone loves to get a call, a message or a visit after all "thats what friends are for"


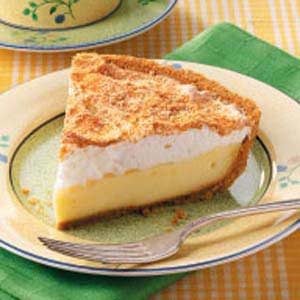
Vanilla Custard Pie Recipe

Vanilla Custard Pie Recipe


  • 1-1/4 cups graham cracker crumbs
  • 3 tablespoons brown sugar
  • 1/3 cup butter, melted
  • FILLING:
  • 1/2 cup sugar
  • 1/4 cup all-purpose flour
  • 1/2 teaspoon salt
  • 2 cups milk
  • 2 egg yolks, lightly beaten
  • 2 teaspoons vanilla extract
  • MERINGUE:
  • 2 egg whites
  • 1/4 teaspoon vanilla extract
  • 1/8 teaspoon cream of tartar
  • 1/4 cup sugar
  • 1/4 cup graham cracker crumbs


1. Combine the graham cracker crumbs, brown sugar and butter; press onto the bottom and up the sides of an ungreased 9-in. pie plate. Bake at 350° for 8-10 minutes or until lightly browned. Cool on a wire rack.
2. In a small saucepan, combine the sugar, flour and salt. Stir in milk until smooth. Cook and stir over medium-high heat until thickened and bubbly. Reduce heat; cook and stir 2 minutes longer. Remove from the heat. Stir a small amount of hot filling into egg yolks; return all to the pan. Bring to a gentle boil, stirring constantly; cook and stir 2 minutes longer.Remove from the heat. Gently stir in vanilla. Pour into crust.
3. In a small bowl, beat the egg whites, vanilla and cream of tartar on medium speed until soft peaks form. Gradually beat in sugar, 1 tablespoon at a time, on high until stiff peaks form. Spread over hot filling, sealing edges to crust. Sprinkle with graham cracker crumbs.
4. Bake at 350° for 15 minutes or until golden brown. Cool on a wire rack for 1 hour. Refrigerate for at least 3 hours before serving. Yield: 8 servings.
 Taste of Home recipe

Zucchini Pancakes


My grandson loves to eat and one of his favorite things is pancakes. When I found this recipe at allrecipes I had to try it. It would offer him pancakes but also veggies. How could we go wrong?? Surprisingly he loved them.


2 cups grated zucchini
2 large eggs, slightly beaten
2 tablespoons chopped green onion
1/2 cup GLUTEN-FREE  flour
1/4 cup grated Parmesan cheese
1/2 teaspoon baking powder
1/2 teaspoon salt
1 tablespoon fresh basil sliced
1/8 cup olive oil, or as needed

Blot grated zucchini with paper towels to remove moisture.
Stir zucchini, eggs, and green onion in a large bowl.
Mix flour, Parmesan cheese, baking powder, salt, and basil in a separate bowl.
Stir mixture into zucchini until batter is just moistened.
Heat  oil in a large skillet over medium-high heat.
Drop quarter cups of zucchini batter into hot oil.
pan fry until golden, 2 to 3 minutes per side.
Drain pancakes on a paper towel-lined plate.
Eat and enjoy.

No Better Than Veggies and Cheese


This family pleasing recipe will be great to serve the family and helps use up some of the excess produce in the garden as well.


4 potatoes, peeled and cut into chunks
5 cups spinach, chopped into big pieces
1 large yellow onion, shredded then sliced into smaller pieces
4 tablespoons butter (divided in half)
1 tablespoon milk
5 ounces cheddar cheese, shredded
2 medium tomatoes, sliced
salt and pepper to taste


Boil potato pieces in a pot of water.  Cook for about 15 minutes or until they are fork done.
Preheat oven to 400 degrees. Grease an oval baking dish..
Heat 2 tablespoons butter in a large skillet and cook until it melts.
Add chopped onions. Cook onions for 5 minutes over medium heat.
Add the chopped spinach and mix together with the onions. Season with salt and pepper.
Cook for only a few minutes until the spinach wilts.
Mash the potatoes with a ricer or masher.
In a large bowl, combine spinach, onion and mashed potatoes.
Add 2 tablespoons of butter and the milk and mix together.
Place the mixture in the greased oval pan.
Place slices of tomato over the mixture.  Spread them out.
Top with shredded cheddar cheese.
Bake in a 400 degree oven for 15 minutes or until the cheese is completely melted and slightly browned.
Let stand for 5 - 10 minutes to cool down.  I think, it is the tomatoes that maintains the heat.
Eat and enjoy.

shared at
meet up monday

Saturday, August 27, 2016

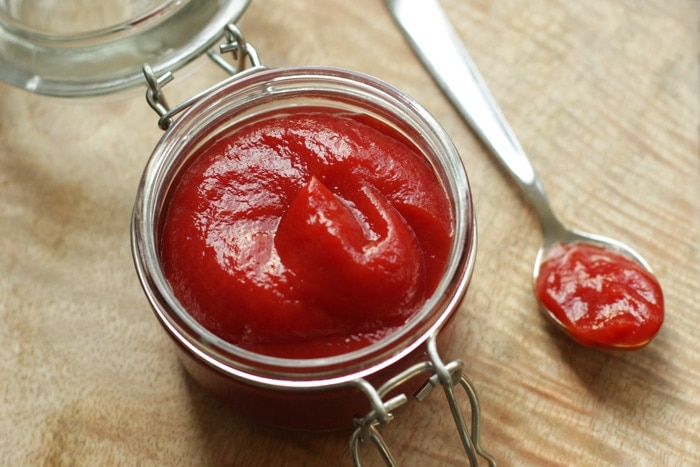
Homemade Ketchup


makes 4 cups

5 lbs fresh tomatoes
2 lb onions- chopped- use sweet onions- yellow onions
4 tablespoons evoo extra virgin olive oil
4 tablespoons tomato paste
1 cup apple cider vinegar
dash of paprika 
1/3 cup splenda brown sugar- - have also used 1/8 cup  pure honey instead-can also use agave sugar- I am still learning measurements with that (one time I used maple syrup- improvise)
clove of garlic is also optional too 
several dashes -dash of salt to taste 
if you want it spicy a jalepeno pepper or tabasco sauce
can also add garlic and a - see its all what I have in the kitchen 

chop up the onion and stick in skillet- brown it on up..meanwhile take the tomatoes and blend em up and make em a soup- now some will use canned tomatoes if you do reserve the juice to make it thicker. blend in all the other ingredients and add the onions- smoothing it out-   If you want it spicy -now is when you add the tabasco or the pepper and blend more. Pour back into onion pan- bring to a boil until its all and simmer for about an hour- now you can also do it in a crockpot but takes a few hours to let it soften and simmer. 
Pour into a sealed container or containers and let chill overnight to get tasty. Should last at least 1  month- have had larger batches last up to 2 months- is freezeable too if you want to use as sauce for sloppy joes, etc.  I am not an expert, I just cook and eat and feed my kids healthy choices.
Some say its not salty enough, I like it so my kids get their vegies and its alot healthier and cheaper  then bottled ketchup.

Make sure you use real olive oil and sweet onions- vidalia onions make it sweeter. yes the recipe can be halved. Yes I have used this recipe for  almost  20 years in one form or another..if its not sweet enough for you- use more splenda brown sugar or whatever sweetener you are using- splenda brown sugar makes it taste the best.  I hope I did not forget anything as I keep it in my brain and have not written it out in many years.

I add more spices when I need a bbq, I add peppers, hot, or tabsaco- have even added maple syrup, and other things.   I used a huge gallon drinking jug for the ketchup that pours and refill a jar as it empties out.

recipe source here

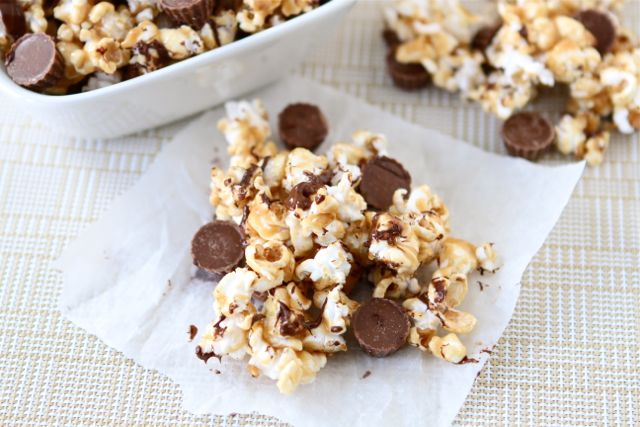
Great Popcorn Snack For Football

What do we want??? a Touchdown, What do we need??? a Touchdown, T-O-U-C-H-D-O-W-N!!!!


Yep that is right Its foot ball season, perfect time to cheer your team on and watch the games. I love to snack at the games no matter if they are home high school football games, college games, or professional football games. Do you like football as well???


Whether you like football or not you very well may like this popcorn snack and share it with a friend as well. Football and popcorn go hand in hand to me. In the past years I would stand in line and purchase my own snacks at the snack stand. While, I still support the groups selling by giving my children and grand-children money I have started bringing along my own snacks. 


8 cups plain popcorn (we use air-popped popcorn)
Fine salt
1/2 cup honey
1/3 cup granulated sugar
1/2 cup natural peanut butter
1/2 teaspoon vanilla extract
1/2 cup milk chocolate chips, melted
1 1/2 cups Mini Reese's Peanut Butter Cups

 
1. Place the popped popcorn in a large bowl and salt to taste. Set aside. 
2. Mix the honey and sugar in a small saucepan and bring to a boil. Let it simmer for about 2 minutes, then remove from the heat and add the peanut butter. Stir vigorously until all the peanut butter is melted, then mix in the vanilla extract.
3. Immediately pour the peanut butter caramel over the popcorn and gently stir with a long-handled wooden spoon until it's all coated. Spread popcorn on a large baking sheet. Drizzle popcorn with melted chocolate and let sit until chocolate hardens. Stir in the Mini Reese'sPeanut Butter Cups.
Notes:
We used air-popped popcorn, but you can use microwave popcorn or stove-top popcorn. If you can't find Mini Reese's Peanut Butter Cups, you can chop up regular Peanut Butter Cups.

recipe source