Custom Search

Tuesday, January 12, 2016

Some Great Ways to Organize

Here are some great ways that I feel would be awesome to help keep you organized in small places.


no shelf space use the walls


no drawer space needed


helps keep it all neat and orderly as well as easy to find


when the box wears out use a small storage box to keep it all together

a frugal tip, take a dollar store muffin tin or if you are like me then you may even have an extra one all ready. Use plastic cups place in the muffin pan holes and fill the cups with desk or art supplies.

Coconut Pineapple Cake

My mother who will celebrate her birthday at the end of January was born into a second generation family from Switzerland Each year for her birthday they would celebrate with a birthday cake similar to this one.


MOIST AND PERFECT FOR SPRING COCONUT PINEAPPLE CAKE
1 1/2 cups unsalted butter, room temperature
2 1/3 cups sugar, divided
6 large eggs, separated
3 3/4 cups cake flour
1 1/2 teaspoons baking powder
1/2 teaspoon salt
1 1/2 cups milk
1 teaspoon vanilla extract
1 teaspoon coconut extract

 
Preheat oven to 350^.  Butter and flour (and add parchment paper, also greased, if your pans stick) 3 nine-inch cake pans.  (For Hubby's party I made 2 larger layers for the ease of our large family gathering with several young children who appreciate smaller slices.  3 layers are prettier.)

In your mixer bowl with beater attachment, combine butter and 2 cups of the sugar.  Beat until fluffy. Add yolks, one at a time, beating well after each addition.

In a separate bowl, sift together all dry ingredients.  Add this dry mixture to the butter mixture alternately with milk, beginning and ending with the flour mixture.  Beat slowly as each ingredient portion is added and mix only until combined.

Beat in vanilla and coconut extracts. Mix on medium for about 30 seconds or just until all ingredients are well combined.

Remove this batter to a different large bowl and clean your mixer bowl.  Whip egg whites until they hold soft peaks, then, while mixing on slow, add last 1/3 cup sugar and whip to stiff peaks.  

Gently fold egg white mixture into batter in thirds.  Spoon batter into prepared pans.

Bake for 25 minutes or until a cake tester inserted into the center comes out clean. (My larger pans took an extra 5 minutes.) When done, remove pans from oven onto wire racks.  Cool for 10 minutes.  Remove cake from pans (and remove parchment paper if used)  and let sit until completely cool.

While cake bakes and cools, make filling and frosting.

Pineapple Curd Filling :
3/4 cup sugar
1/4 cup cornstarch
1 20-oz can crushed pineapple, drained--keep both juice and pineapple
2 Tablespoons freshly squeezed lemon juice
3 egg yolks, lightly whisked
1/4 cup unsalted butter  (1/2 stick of butter)
1/2 teaspoon pineapple extract
pinch salt
 
Using a heavy saucepan, combine sugar and cornstarch and salt.

Add the drained pineapple juice and the lemon juice.  Whisk together.

Add the yolks and cook on medium heat until mixture boils..boil for 30 seconds more until mixture becomes thick like a pudding.  Remove from heat.

Stir in butter until completely melted.  Now stir in the crushed pineapple and pineapple extract.  Let this filling cool.  If necessary refrigerate for an hour.  (This filling should be thick enough to not spread or run when spooned onto a cake layer, but soft enough to spread easily when pushed over the layer with a spoon.)


White Frosting  :
8 ounces white chocolate  (Place in medium size microwavable bowl.)
1/4 cup heavy cream (Add cream to white chocolate and microwave 30 seconds, until mixture is just warm.  Stir these 2 ingredients together until smooth and creamy.  Microwave again in short bursts if necessary.)
1/2 cup butter, room temperature  (Add to white chocolate-cream mixture and stir until smooth.  If too thick or white chocolate not completely melted, microwave for 10 second bursts and stir until smooth.)

Place above into mixer bowl with beater attachment and add:
1/2 cup sour cream
1 Tablespoon coconut extract

Beat until smooth and creamy.  Mixture should now be cool.

Next, add about 6 cups confectioner's sugar.  Easiest to add 2 cups at a time and beat slowly after each addition.  When all sugar has been added, beat on medium high until smooth and fluffy.  Add enough sugar to make frosting a consistency that is  easily spreadable or that can be piped and will keep its shape.

Assembly:

Place one cake layer on cake platter and top with 1/2 of the pineapple curd filling.  Spread to within 1 inch of cake edge.  

Add second cake layer on top and then add 1/2 of the curd on top of this layer, again spreading to within 1 inch of cake edge.  (When a layer is added on top of the filling it will push the filling further to the cake edge, but not over the edge and into the area where you will want to frost.  Curd and frosting will not mix well.

Now add the top cake layer and you are ready to frost sides and top of cake.  There should be enough curd and frosting to completely cover wanted areas well.

Add sweetened, shredded coconut to sides and top of cake immediately after frosting.  As cake sits, the exterior will set up a little so that the coconut will not stick.

Note:  Any white or yellow or sponge/angelfood cake will work.  What really makes this cake wonderful is the delicious filling which keeps the cake moist.  Also this simple, beautiful frosting is a lovely white contrast to the very yellow filling, making a lovely Spring presentation.  I chose to decorate my cake top  with Spring flowers from our yard.  (See previous post.)  This cake keeps well at room temp for 2 days.


Monday, January 11, 2016

Stephen Foster

Stephen Collins Foster was born July 4th , 1826 and was knows as the father of American music. He lived a short life only 38 years. Today that would be mid-life. During his years he wrote over 200 songs primarily parlor and minstrel music. Some very famous songs that would consider old home songs, many I learned in Elementary school. Songs such as

Oh! Susanna
Camptown Races
Old Folks at Home
My Old Kentucky Home
Jeanie with the Light Brown Hair
Old Black Joe
Beautiful Dreamer

Many of these songs are still popular among folk singers and those that love to listen to folk music. Identified as the most "famous songwriter of the nineteenth century"


Good-Bye Mr Bowie


David Robert Jones aka David Bowie was born January 8, 1947. Today, the news reported the sad news of his departure into eternity.

An English singer, songwriter, multi-instrumentalist, record producer, arranger, painter and actor. For five decades he made his mark in popular music. He made his own move in his music and his looks. In my teen years he was a pop icon and many agreed with me.

1975 was the year the Bowie would first see success as a singer with a number one single "Fame" on the album Young Americans. The list would continue to grow with both British and American top songs. From the 60s to his last tour in 2003 Bowie was active top star among musicians.

Here are some of what he was the most famous for:


.


Have a Hot Toddy

A winter storm is brewing outside and to tell you the truth a storm is brewing inside of many chest and heads as well. Germs have been visiting and transferring from person to person for quite some time and the cold weather simply makes some feel worst. One drink that can help all those under the weather or simply trying to stay warm is a hot toddy. A hot toddy is a soothing drink that can warm one up and offer them a bit of relaxation.

A warming alcoholic concoction can be  traced back to the 18th and 19th century. Years of cold weather brought on a drink that offered warmth. Mixing the whisky with hot water and adding flavors gives this spirited drink a boost. Other alcoholic beverages that fit the theme of warmth are mulled wine or mulled cider.


 Whisky one with a sweet flavor often works best
Honey: .
Cinnamon
Cloves
Boiling water

Method:
Simply put a shot of whisky in a mug and top up with boiling water.
Add a generous spoonful of honey and stir in
Add a couple of cloves and some cinnamon to taste.
Enjoy while wrapped up, shared with a loved one

Stop Smoking Do IT for Your Health

 
January 11th is a day to recognize that "Cigarettes are Hazardous to you Health". The truth is that big tobacco companies have known this fact for over 50 years. In the 1950s tobacco companies knew the dangers of their products but continued to market them to the public. They literally placed sales over safety.
 
Smoking tobacco has been proven to be hazardous to your health. Is one of your New Year's resolutions to quit smoking?


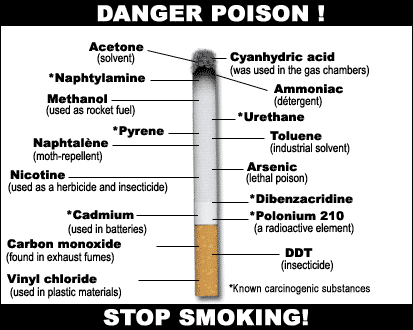
The effects of cigarette smoking are dangerous and even deadly. Approximately 4000 chemicals are present in the chemical composition of cigarette. Hundreds of those chemicals are toxic. The ingredients in cigarette affect everything from the internal functioning of the organs and target the efficiency of the body's immune system. Every organ in the body can be harmed by smoking. Not only does smoking damage your organs but may cause many diseases and reduce the health of smokers.


When you are smoking a cigarette the chemicals that are in the smoke starts to travel through your body and begin to cause damage in several ways. Carbon monoxide starts to bind to the red blood cells preventing affected cells from carrying a full load of oxygen. Carcinogens in tobacco smoke start to damage genes responsible for growth Benzo pyrene binds to cells in the airways and your major organs The lungs and immune system begin to break down and the risk of you catching respiratory and other infections grow. The smoke from the cigarette helps promote atherosclerosis and chronic lung injury.  Your aging process is out of control and your skin and organs realize this much earlier than you do. You begin to develop cancer, cardiovascular disease and COPD. It only takes 10 seconds after you first inhale smoke for nicotine to be apparent in your body. Perhaps it does not only take one cigarette to totally deteriorate your health but the first is the start of a process that your body would rather not take.

An estimated 443,000 deaths are caused directly by cigarette smoke this is more than the HPV virus, illegal drugs, alcohol use, motor vehicle injuries, suicides, and murders combined.


Low Fat Lemon Squares with Walnut Crust


Looking for a tasty recipe that is low fat as well well this delicious recipe is what you have been looking for. Exchanging butter in the crust for buttermilk and oil, egg substitute (or egg whites) helps this recipe have a great taste but cuts out the fat.
 
 
Low Fat Lemon Squares with Walnut Crust
Crust:
1 cup all purpose flour
1/4 cup sugar
1 tsp lemon zest
1/4 cup finely chopped walnuts (lightly toasted, preferably)
1/3 cup buttermilk
1 tbsp canola oil
Preheat oven to 350F. Lightly spray an 8×8 baking dish with nonstick cooking spray.
In a medium bowl, combine the flour, sugar, lemon zest and the walnuts. In a small bowl, whisk together the buttermilk and oil, then drizzle it into the flour mixture. Cut in using a fork until combined, then press the dough into the bottom of the pan. Bake for 15 minutes or until light brown on the edges.
While that is baking, prepare the topping.
 
Lemon Topping:
2 egg whites and 1 whole egg
2 tbsp flour
3/4 cup sugar
1 tbsp lemon zest
3 tbsp lemon juice (one medium/large lemon)
1/4 tsp baking powder
 
 
Combine all ingredients in order listed and beat on high for 2 minutes with an electric mixer, until throughly combined. Pour over the baked layer and put the whole thing in the oven for an additional 20 minutes, until the center of the lemon topping is set.
Let it cool in the pan.
Slice into bars (recipe suggests 20, but I made 25 slightly smaller ones) and top with a sprinkle of confectioners sugar.
Nutritional information per bar: 86 calories, 2 grams fat (19% calories from fat); keep in mind that just about all the fat is healthy fat, from vegetable oil and walnuts. Now that is something to get nuts over.
 
recipe source here

Sunday, January 10, 2016

Buttermilk Pie and find out a bit more about me


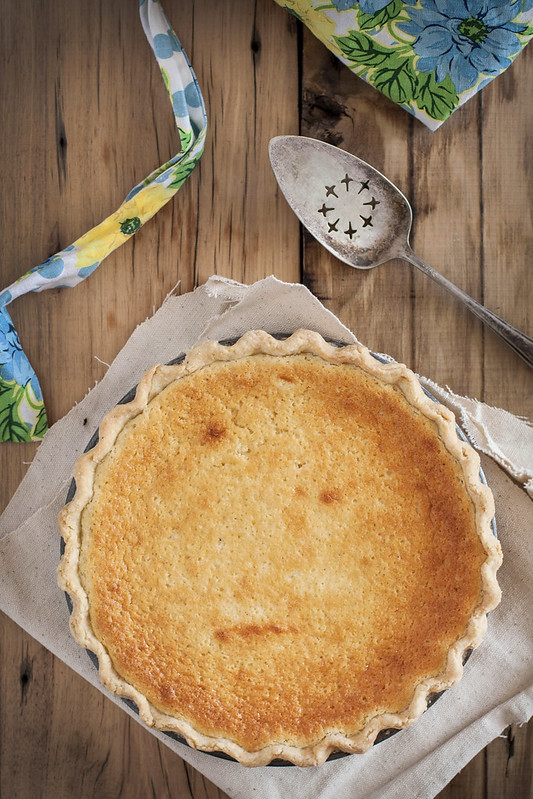
This pie recipe brings back such warm memories. The thoughts of visiting my husbands family where you could imagine this was always available. There was never a chance when the delicious goodness of his mom and grandma were not present during a family gathering. The family did not have a lot of money but what it missed in financial respect it made up in love and hard work. His grand-father worked in the coal mines for many years passing away due to black lung disease. In the days that he worked the mines there was not the protective gear that today miners have nor was the money there. It was hard dirty work and you ended up owing more than you brought in on pay day. His uncles were mechanics and worked hard and could take any old junker and make it humm. Those men loved to eat and eat hardy and grandmas buttermilk pie was something that was always invited.

Cornmeal Lard Crust

from Sarah Malphrus, pastry chef of Husk Restaurant in Charleston, SC
yields one single crust pie

This crust gets an awesome crumbly texture from the cornmeal, and a ton of flavor from the lard and butter. It’s a secret weapon of a crust to have tucked into your apron like a pistol. Or a dagger. Or throwing stars. You know, your weapon of choice. Mine is pie crust. Really can’t thank Sarah enough for passing this one along.
1 cup all-purpose flour
1/3 cup cornmeal
1/2 tsp salt
1/4 cup cold pork fat, cut into 1/2″ pieces (I use leaf lard)
1/4 (half a stick) butter, cut into 1/2″ pieces
1/4 cup ice cold water
Mix flour, cornmeal, and salt. Cut in fat and butter until no pieces larger than a pea remain. Slowly add the water, working it into the dough with your hands until it comes together. On plastic wrap form the dough into a disc 4″-5″ across  wrap, and chill for at least an hour. When ready to use roll out on a floured surface to fit a 9″ pie pan, flouring as needed to keep from sticking.
 

Buttermilk Pie

from Celeste Albers of Wadmalaw Island Farm & Dairy by way of Sarah Malphrus
yields one 9″ pie

I’ve seen my fair share of recipes for buttermilk pie, but I happen to agree that this is the best. Folding in the egg whites gives it this almost soufflé like texture. It’s a very light and airy, almost like a light cake, which isn’t what you expect. It hasn’t too much sugar or lemon. It’s just perfect. It puffs up so golden in the oven, and then settles nicely as it cools. I bake mine on the lower rack in my oven as I find it gets a little brown a little fast on the middle rack. But everyone’s oven is different. Remember to bring all your ingredients to room temperature before you start. It matters. I like this so much it is joining Sugar’s Chocolate Pie (my grandmother’s famous pie that I now make in her stead) in the Thanksgiving pie line-up. So, it’s kind of a big deal.
2 eggs separated, room temp
6 Tbsp unsalted butter, room temp
1 cup  sugar
3 Tbsp flour
1 Tbsp lemon juice
1/4 tsp nutmeg
1/4 tsp salt
1 cup buttermilk, room temp
powdered sugar (optional, for dusting)
*would also be good with fresh whipped creamRoll out your crust and put it in your pie pan. Cover in plastic and chill in the fridge while you make your filling.Heat oven to 350° F.Beat egg whites until soft peaks form and set aside. With whip attachment cream butter and sugar in a stand mixer. Add yolks to butter-sugar mixture and combine well. Add the flour, lemon juice, nutmeg, and salt to the mixture. Slowly steam in buttermilk and mix for 1 minutes. Fold the whites into the buttermilk mixture.Remove crust from fridge and pour in mixture. Smooth with spatula and bake for 45-50 minutes or until golden and set in the middle. Cool thoroughly on a rack before serving. Dust with powdered sugar if you like or top with fresh whipped cream.

Do You Know Your Salads and a bonus salad recipe


When I was younger when I thought about dieting I would think about eating a salad. There are salads that are great for helping one to get trim and stay on a diet but there are many that others that are not meant for dieting. A salad most often made up of a mixture of uncooked vegetables that are covering a base of green leaf leaves.


Types of Salad:


Green Salad includes tomato, cucumber, peppers, mushroom, onions, spring onion, carrot and radish. While not all of them are always in the salad there are many of them included. A green salad could also include pasta, olives, cooked potatoes, rice, croutons, meat and poultry or bacon, cheese or seafood such as tuna or crab.


Vegetable Salad
Raw vegetables such as cucumber, peppers, tomatoes, mushrooms, onions, spring onions, red onion, carrots, celery and radishes. Other items such as avocado, olives, hard boiled egg, artichoke hearts, heart of palm, roasted red bell peppers, green beans, croutons, cheese, meat such as bacon or chicken or seafood such as tuna or shrimp.


A bound salad can be arranged or tossed. Thick sauce such as mayonnaise helps to assemble the salad. A bound salad can be dipped up with an ice cream scoop and still hold its shape. Bound salads include tuna salad, pasta salad, chicken salad, egg salad, and potato salad Many of these sandwiches are often used as sandwich filings and are popular at picnics and barbecues. They are often made ahead of time and chilled.


Main Course Salad or a dinner salad or entrée salad contains grilled or fried chicken pieces, seafood such as shrimp, tuna, mahi mahi or salmon, or sliced steak. The entrée is placed upon the salad. Examples of this salad are casesar salad, chef salad, cobb salad, and Greek Salad.


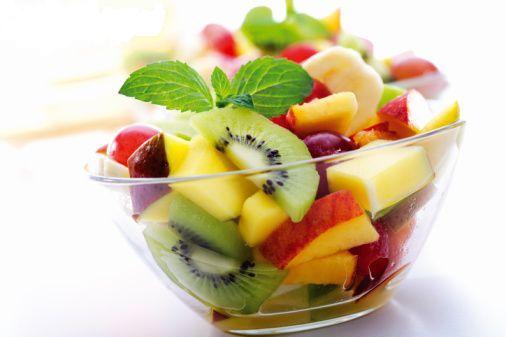
Fruit salads are made up of fruit. These salads can be made from fresh or canned fruit.


Dessert Salads includes leafy greens and are sweet salads. Made up commonly of gelatin or whipped cream Examples are jello salad, pistachio salad, and ambrosia. One of our favorite dessert salads is snicker salad.

Mexican Salad

1 pound lean ground turkey
1 envelope taco seasoning
Generous bed of lettuce
1 cup chopped tomatoes
2 ½ cups chopped onions
Salsa
1/3 cup shredded reduced-fat cheddar cheese


In a saucepan, brown the ground turkey over moderate heat. Add taco seasoning and cook according to package directions. Place generous servings of lettuce on 4 plates. Top with turkey mixture, tomatoes, onions, salsa, and cheese. Makes 4 servings.

shared here

First Snow

 
This morning we enjoyed seeing God's beauty through the first snow of winter and the first snow of 2016. These are pictures from around our area The snow to me is beautiful. While I do not like to get out in it I do love looking at it through pictures and out the window.
 
 
Sunday mornings especially snowy Sunday mornings are perfect for glazed doughnuts. Whether you purchase them from a deli or bakery


Baking in the oven on a winter snow day also helps keep the kitchen warm. You may want to make up a batch of glazed doughnuts for breakfast for your family.


Farm Stand Buttermilk Doughnuts Three Ways
Ingredients
For the Doughnuts
3 1/2 cups all purpose flour
3/4 cup granulated sugar
1/2 teaspoon baking soda
2 teaspoons baking powder
1 teaspoon salt
1 teaspoon freshly grated nutmeg
1 teaspoon cinnamon
2 large eggs
3/4 cup buttermilk
1/4 cup sour cream
1/4 cup (1/2 stick) unsalted butter, melted and slightly browned and cooled
Vegetable oil for frying

For the Chocolate Dip
4 ounces good quality dark chocolate (60-70%), coarsely chopped
1/2 cup heavy cream
2 tablespoons unsalted butter
Sprinkles to decorate (optional)

For the Vanilla Glaze
2 cups confectioners' sugar
1/4 cup whole milk
1 teaspoon vanilla paste or 1 1/2 teaspoons pure vanilla extract
Sprinkles to decorate (optional)

For the Cinnamon Sugar
1 1/4 cups granulated sugar
3 tablespoons cinnamon

Make the doughnuts
Line one baking sheet with parchment paper and another baking sheet with two layers of paper towels.

In a large bowl, whisk together the flour,sugar,baking soda,baking powder, salt,nutmeg, and cinnamon.

In a medium bowl, whisk the eggs, buttermilk, and sour cream until combined.  Add the melted,cooled butter and whisk again.

Make a well in the center of the flour mixture and pour the liquid ingredients into the well.  With a rubber spatula, slowly fold the flour into the liquid center until the mixture forms a sticky dough.

Turn the dough out onto a work surface lightly dusted with flour.  Sprinkle the top of the dough with flour and pat it out until it is about 1/2 inch thick.
Use two round cutters ( 3 1/4" and 1 1/2" for large doughnuts; 2 1/2" and 1 " for smaller doughnuts).  Dip the large cutter in flour and press out the rounds.  Dip the smaller cutter in the flour and cut out the center of each dough round.  Arrange both doughnuts and doughnut holes on the parchment-lined baking sheet, pat the dough scraps back together, and use them to make as many more doughnuts and doughnut holes as possible.  Chill the dough while you heat the oil.

Pour enough oil into a deep skillet to make a layer approximately 1 inch to 1 1/2 inches deep.  Slowly heat the oil over medium -high heat until it is 365 to 370 degrees F.

While you are waiting for the oil to reach temperature, make the assorted toppings.

Make the Chocolate Dip
Place the chopped chocolate in a medium wide-mouthed bowl.  In a small saucepan, heat the cream until it is just about to boil.  Pour the cream over the chocolate and wait 1 minute.  Whisk until smooth.  Whisk in the butter.  Keep the mixture warm.

Make the Vanilla Glaze
In a medium wide-mouthed bowl, whisk together the sugar, the milk, and the vanilla paste.

Make the Cinnamon Sugar
In a medium wide-mouthed bowl, whisk together the sugar and cinnamon.

To Fry the Doughnuts
Once the oil reaches temperature, gently lift the large doughnuts off the baking sheet and place them in the hot oil.  Do not crowd the skillet-make no more than 3 doughnuts at a time.  Once they have browned on one side (this takes 2-3 minutes), turn them over with tongs or a slotted spoon and continue to cook for another minute or just until browned (they can overcook or burn rather quickly).  Using a slotted spoon, transfer the doughnuts to the paper towel lined baking sheet and continue to fry the rest of the dough until finished.  The doughnut holes will cook faster and can be made in two or three batches after the doughnuts are done.

Assemble the Doughnuts
Once you have finished frying, work quickly to dip the doughnuts in the chocolate or vanilla glaze, or the cinnamon sugar.  If you like, decorate the chocolate or vanilla doughnuts with sprinkles.  Serve immediately.

Baked Notes
When you fry doughnuts make sure you maintain the correct oil temperature throughout the process.  Generally speaking, doughnuts taste best served immediately after they've emerged from the fryer ( and taken a quick dip in sugar or chocolate or vanilla.  However if they don't disappear quickly when served take day old doughnuts and chop them into big coarse crumbs, toast them lightly, and add them to vanilla ice cream as a mix in (if you are making it from scratch) or a topping (if you are serving store bought). Doughnuts also work wonders (very rich wonders) when used as the base of a bread pudding.


Winter may be finally on its way. The first month of the year and not a flake of snow as of yet. Seems a bit different but then of course I have seen winters like this before. But since winter may be rearing its ugly head you may want to prepare not only your self but your house plants as well.


I know that many of them are all ready inside the house.
There are a few more things that you can do to care for them. Here are a few tips:

Check the leaves of your house plants for brown dry edges. You may want to group your plants together to build up a bit of humidity.

If you find your house a bit dark consider using artificial lights to provide more light for your plants.

In winter growth slows down and may even stop all together. Your indoor plants may not need as much water as they do in warm weather months.

Keep your houseplants longer by keeping them in in a cool but brightly lit area. The best area for your plants are away from warm areas and cold drafts.
.
.

Cut Your Energy Costs


Sunday January 10th is National Cut your energy cost day. There is no other day better to look for options to make your home more energy efficient. Saving money is sometimes hard to do one way that it can be done is by taking steps to make your home more energy efficient.


Windows are notorious for letting hot air escape and allowing cold air in. Replacing your old windows with double or triple glazing provides a valuable difference to the home, they help to keep the cold air out and hot air in. Not only will you enjoy the comfort of the home but also see a noticeable difference in your bills.

Replacing exterior doors is also an idea you may want to check into. Old doors are often responsible for large amount of heat loss. To remove the threat of heat going out and cold air creeping in you may want to look into purchasing new doors. When looking for new doors remember to keep in mind security and airtight design.

Not only will making these changes in your home save you a substantial amount of money but they’ll also help protect the environment which is increasingly becoming the victim of climate change.


Are you aware that around 1/4 of the heat in any home escapes through the roof. Insulation is another good investment to put into your home. Loft and wall insulation is something you should look into and will help you cut your energy bills. Homes built before 1990 do not have any wall insulation.

Those that garden may think about investing in a rain barrel. Capturing rain and watering your garden saves money in water bills. Plants often prefer rainwater over tap water


.What do you do to save money on your energy bills?

Slow Cooker Chicken Tacos

Slow Cooker Chicken Tacos


Ingredients
Chicken Filling
  • 2 pounds chicken breasts
  • 3 cups salsa verde, divided
  • 1 cup chicken broth
  • 2 cloves garlic, minced
  • 1/2 tsp Kosher salt
For the Tacos
  • 8-10 corn tortillas
  • 1 red onion, thinly sliced
  • 3/4 cup shredded cheese or crumbled cotija cheese
  • lime, cut into wedges
  • 1/2 cup cilantro, chopped
  • avocado, diced
  • 1 cup salsa verde to use as sauce
Directions: Mix together 2 cups salsa verde, chicken broth, garlic, and salt in crockpot. Add chicken breasts and cook for 4 hours on high or 8 hours on low. Remove chicken from slow cooker, discard liquid, and shred chicken using two forks. Add remaining salsa verde (1 cup) and mix to combine.
Fill tortillas with shredded chicken, cheese, red onion, cilantro, avocado, drizzle of salsa verde and a squeeze of lime juice.

recipe source here

Saturday, January 9, 2016

Child Center Divorce

Last year we saw our daughter end her marriage and go through a divorce. This was hard for all. Our little princess felt it a lot as well. I have heard her say more than once "I wish my mommy and daddy were still together" or "back when mom and dad and me lived in one house" While divorce is hard for all we should always be ready to help the children and keep them in mind when decisions are made.


Take some time and think about these questions to ensure that you are doing the best for your child. While staying together is not always possible it is best to help the child out and remember they love both mom and dad

• Did you respect the fact that children innately love both parents and are wounded when one of them is disparaged, regardless of your personal perspective about it?
• Did you force your child to be a spy or go-between, taking on responsibilities that children should not bear?
• Did you ask your child to choose between loving Mom or Dad, or take sides in any way?
• Did you keep their other parent from active participation in their life because you wanted to hurt your spouse?

All of the things are above are behaviors that are often made without considering the children's feelings and often out of revenge. Children often are left scarred from the inside out. Often the issues that cause the damage is not needed. The divorce is not what harms the child it is the actions that take place during a divorce. Tension, discord, anger, and disrespect toward the other parent is actions that harm children.

Think twice before you act or speak. Is it really needed or is it something that is only there to hurt your ex-partner. Keep the feelings of your children in mind, they will thank you and remember when they grow up.


shared on facebook at
creative blogger ===== blog comment

Healthy Stir Fry

 Many of us will want to start a new this January as we welcome the New Year in. For some of us including myself that means eating healthier. The yummy recipes that can be healthy for us as well are some of my favorites. Check out this stir fry recipe and great news it is a healthy recipe as well.


Chicken, veggie, and cashew stir-fry

Serves 4
  • 1/2 lb chicken breast, poached and cut into 1/8-inch wide, 3-inch long strips
  • 1 tsp extra virgin olive oil
  • 1 clove garlic, minced
  • 1/2 cup sliced carrots
  • 1/2 cup sliced onion
  • 1/2 cup sliced green pepper
  • 1 cup bean sprouts
  • 2 cups zucchini, cut into thin strips
  • 1/4 cup cashew pieces
  • 1 tbs soy sauce
  • 1 tbs cornstarch
  • 1/4 cup water
Heat oil in a skillet and sauté the garlic for 1 minute. Add the carrots, onion, green pepper, and soy sauce, cover, and stir fry for 3 to 4 minutes. Add zucchini, bean sprouts, and cooked chicken and stir fry for 3 to 4 minutes. Mix cornstarch and water until smooth. Pour it slowly into the chicken and vegetable mixture, stirring constantly. Cook until thickened and the mixture is well coated. Toss in cashew pieces and serve with brown rice.

recipe source here

Easy Apricot Bars

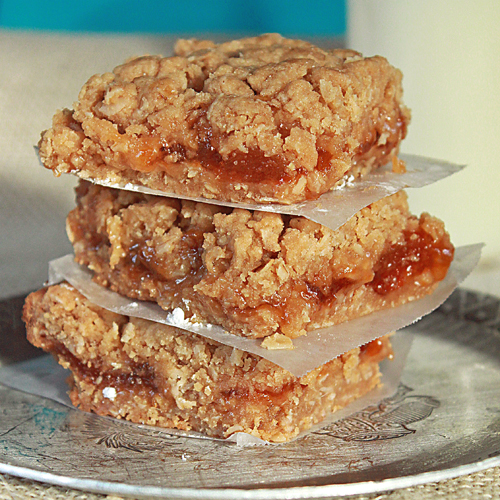
Easy Apricot Bars


1 1/2 C. oats (I used the regular, not the quick-cooking kind)
1 C. packed dark brown sugar
1 1/2 C. all-purpose flour
1/2 tsp. salt
1 tsp. baking powder
1 3/4 sticks salted butter
1 C. apricot preserves
Powdered sugar (optional)

Preheat oven to 350 degrees.  In a mixing bowl, combine the dry ingredients.  Add butter, slightly softened, cut into 1″ pieces.  Stir until well-combined, but still slightly crumbly.  Press half of the oat crumbles into a buttered 8×8 glass baking pan.  Next, spread the apricot preserves on top of the crust.  Sprinkle the rest of the oatmeal crumbles on top of the apricot preserves layer.  Pay down gently.  Bake 35-40 minutes or until golden brown.  If desired, sprinkle with powdered sugar.  Allow to cool before cutting.  Enjoy

recipe source here

Biscuit Baking Day


Biscuits may have been the first convenience food and in the days of the wood fired stoves almost fast food. Biscuits were quick, easy and required few ingredients that they were commonly found on the tables in the south. Moms in the south commonly cooked biscuits up for their families every morning. They would eat them for breakfast and take them in their pails for lunch.

My husbands grandmother would whip a pan of biscuits nearly every day. My husband lived at home with her and I would often stop by and enjoy a biscuit with warm butter. It was very tasty and she would tell me stories of old. Old stories that were stories of her life. Every day for most of her life she would make up some biscuits for her grandma that raised her, for her parents, and her husband and children.


  • Chill the bowl used to mix the dough as well as the pastry blender to prevent the butter or shortening from warming up.
    • Cut the butter into flour until the mixture resembles coarse crumbs. Cold bits of butter or fat will melt during baking, creating pockets of steam that give biscuits their flakiness.
    • When working with butter, cut it into small pieces, and chill again before adding to dry ingredients.
    • Dip the cutter in flour. Cut the biscuits smoothly and cleanly straight down without twisting. Twisting can seal the dough and prevent the rise.
    • As Nathalie used to tell me, “Get your hot little hands off that dough.” Handle the dough as little as possible. You don’t want to make the biscuits tough by overworking, and you want the fat to stay cold until the biscuits bake.
    • A very hot oven is essential. The steam interacts with the baking powder to create the biscuit’s ideal textures inside and out.
    • The perfect biscuit should be golden brown and slightly crisp on the outside, with a light, airy interior. For a flaky, tender biscuit, don’t overwork the dough: gently combine the ingredients until just blended

    2 cups White Lily or other Southern all-purpose flour, or cake flour (not self-rising), more for rolling out
    1 tablespoon baking powder
    1 teaspoon fine sea salt
    4 tablespoons (1/2 stick) cold unsalted butter, cut into bits and chilled
    3/4 to 1 cup buttermilk
     
    1. Preheat the oven to 500°F. In a bowl, combine the flour, baking powder, and salt. Using a pastry cutter or two knives, cut the butter into the flour mixture until it resembles coarse meal. Pour in the buttermilk, and gently mix until just combined.
    2. Turn the dough out onto a lightly floured surface. Knead lightly, using the heel of your hand to compress and push the dough away from you, then fold it back over itself. Give the dough a small turn and repeat 8 or so times. (It’s not yeast bread; you want to just barely activate the gluten, not overwork it.) Using a lightly floured rolling pin, roll the dough out 1/2 inch thick. Cut out rounds of dough with a 21/4-inch round cutter dipped in flour; press the cutter straight down without twisting so the biscuits will rise evenly when baked.
    3. Place the biscuits on an ungreased baking sheet or in an 8- by 2-inch round cake pan. If the biscuits are baked close together the sides will be moist. If the biscuits are baked further apart, the sides will be crisp.
    4. Bake until golden brown, 8 to 10 minutes. Transfer to a rack to cool just slightly. Serve warm.
    5. variation: If I don’t feel like rolling out biscuits, or just want a different texture, I tweak the recipe by adding more buttermilk to the dough and make drop biscuits: use 3 cups of flour—2 for the dough and 1 cup placed in a bowl to shape the dough into biscuits. Increase the buttermilk to 2 cups. The dough will be very wet and resemble cottage cheese. To form the biscuits into balls, scoop up some dough with a large ice cream scoop; place the dough balls in the bowl with the 1 cup of flour. Working one at a time, roll the balls to coat in flour, then set in an ungreased 8- by 2-inch round cake pan. The baking time will be the same as for cut biscuits


    Histor of the Cassoulet and a Delicious Recipe

    Cassoulet is legendary dish that dates back to the 14th century. Southwest France during the hundred year war was the environment for creating a dish that would feed those that needed it that day and become a dish that would go down in history as well. As the soldiers found their selves surrounded they pulled together to make a meal with their last remaining rations. Though, the battle was lost the new filling dish became known as the cassoulet became a fixture in the cuisine style of the land.

    Madame Mouriere's Cassoulet


    • 4-5 legs of duck confit
    • 2 pounds dried white beans (Great Northern are excellent)
    • 1 pound fresh pork rind or bacon, cubed
    • 2 bay leaves
    • 1 teaspoon dried thyme
    • 1/2 pound carrots, peeled and cut into 1/2-inch rounds
    • 1 tablespoon salt
    • 1/2 cup goose fat (see note) or butter
    • 2 1/2 pounds fresh all-pork garlic sausage (Polish or German sausage is fine)
    • 1 pound medium-sized onions (about 4) thin sliced
    • 2 cloves garlic
    • 2 1-pound-10 3/4-ounce cans imported plum tomatoes, undrained
    • 2 cups fresh bread crumbs, blended with
    • 2 cloves finely minced garlic


    1. The day before the cassoulet will be served prepare the beans. Rinse them well and pick them over to eliminate tiny stones. Put them in a Dutch oven or large saucepan and cover with cold water. Bring to a boil, cover and remove from the heat. Allow to sit 40 minutes.

    2. Meanwhile, in another large saucepan cover the fresh pork rind or bacon with cold water and bring to a boil over high heat. Simmer for several minutes, rinse, drain and set aside. This is done to remove the salt, which would have a toughening effect on the beans.

    3. By this time the beans should have swollen. Discard the liquid (to help make the beans more digestible), rinse the beans and cover them again with cold water. Add the bay leaves, thyme, and drained pork rind or bacon and bring to a boil over medium-high heat. Boil vigorously for about 45 minutes to one hour, or until the beans are quite well-cooked but still a bit firm. Add the carrots and additional boiling water if necessary and cook an additional 15 minutes, or just until the carrots are cooked. The mixture should not be too dry. Remove from the heat, stir in a tablespoon salt and allow to cool to room temperature. Cover and refrigerate overnight.

    4. In a very large frying pan melt three tablespoons goose fat (or butter). Add the sausages all in a single coil, if you can, and cook them over medium heat for about 12 minutes on one side, about 6 minutes on the other side. (Remember which side was cooked for the shorter time. When the cassoulet is assembled, you will place the sausage with the less cooked side down, so the remaining fat will soak into the bean mixture.) You need not prick the sausage. Remove the sausage from the pan and set aside.

    5. In the same saucepan, add an additional three tablespoons goose fat (if necessary) to cook the confit. Let it come to room temperature to soften the fat and remove all of the confit pieces, wiping off the fat as you remove them. Now saute the pieces of confit over medium-high heat until the skin is very crisp and turns a rich, deep brown. Baste off the fat as necessary. The duck should cook about five to 10 minutes on each side. Remove from the frying pan, drain and set aside.

    6. Remove the bean mixture from the refrigerator to bring to room temperature.

    7. Preheat oven to 325 degrees.

    8. In the same frying pan, add two tablespoons goose fat (if necessary) and cook the onions over high heat for about 5 minutes. Add the tomatoes and the liquid and a clove of garlic and cook until the mixture is fairly dry, or about 30 minutes. The mixture should be a rich, deep red. Combine the bean and carrot mixture with the tomato and onion mixture.

    9. Remove the bones from the duck confit and cut the duck into large chunks without removing the skin.

    10. Assemble the cassoulet in a large, earthenware casserole. An oval casserole measuring 12 by 17 by 3 inches deep is a perfect size for this recipe. Rub the inside of the casserole with one clove of garlic and discard the garlic. Layer in this order: a single layer of the bean mixture, using about a third of it. Cover this with the cutup pieces of duck. Add a second layer of the bean mixture. Add the sausages in one layer with less-cooked side down. Add the last layer of beans. Finally, add the bread-crumb mixture. Be sure there is at least half an inch of growing space between the bread crumbs and the rim of the casserole.

    11. Place in the oven and bake for 1 1/2 to 2 hours, or until the crust is golden and firm. Serve immediately.

    YIELD: 10 to 12 servings

    No til farming

    Growing up in the country with grandparents that were farmers I remember the work was year round. One thing farmers do after the harvest and before the planting season is to tend to their fields. The choice is no till or to till  the fields.
     
    NO till is a method used by those in agricultural where farmers do not turn the soil between seasons. Leaving crop residue in the fields between season is a way to protect the fields against erosion. Not tilling the fields leaves the roots of the plants intact.  The roots help protect the fields against both wind and water erosion. The soil is also able to regenerate natural soil horizons and reduce emissions of CO2 because the no till field undergoes less oxidation.
     
    The one downside of the no till method is that to protect the fields from weeds more herbicides must be used. 
     

    Friday, January 8, 2016

    Organize your desk

    January is National Organized Month. So why not join in and start organizing your place as well. Perhaps it was a resolution of yours to make your desk neater and looking great. Here are a few tips that will help you do just that


    Take the items off your desk that you need to keep but rarely use and put the in a drawer that is clearly marked for what you put in it.


    Use a binder to organize the documents you need to keep. This will help keep all those lose papers in one place.


    Create folders on your computer to keep programs and documents that you need. They will all be I one place organized.


    .

    Buffalo "Chicken" Lollipops

    Buffalo "Chicken" Lollipops
    (makes approx. 27)


    20 ounces (1.25 lbs.) 99% Fat Free Ground Turkey Breast
    1/2 cup finely grated zucchini (approx. 1 medium, grated on the finest side of a box grater)
    1/3 cup finely grated carrot (approx. 1 medium, peeled, then grated on the finest side of a box grater)
    1 teaspoon garlic powder
    1 teaspoon onion powder
    1 1/4 teaspoons kosher salt
    1 large egg, beaten
    1 tablespoon butter
    1/2 cup of your favorite wing sauce (mine is Frank's Red Hot)
    4 ribs of celery, sliced into quarters vertically, then cut in half horizontally (for a total of 8 pieces per rib)
    Reduced fat Blue Cheese Dressing, for dipping (my favorite is Marzetti Simply Dressed Light, which can be found in the produce section of most grocery stores near the bagged lettuce.)

    Preheat oven to 350 degrees F.
    In a large bowl, combine turkey, vegetables, spices beaten egg and 1 teaspoon wing sauce.  I find hands to be the best tool for gently mixing the ingredients together.  Do not squeeze or overmix.
    Spray a baking sheet with nonstick spray.  Scoop meat mixture into 2 Tablespoon sized portions.  I tried making smaller balls, but they need to be big enough for the celery stick to be inserted without breaking the whole meatball apart.  Roll portion gently between palms to form a smooth ball.  Place on baking sheet.
    Bake meatballs on center rack for 15 minutes.  While meatballs are cooking, melt butter in a large bowl.  Stir in 1/4 cup of wing sauce.  Set aside.
    Remove meatballs from oven.  Transfer meatballs to the bowl of sauce and toss to coat.  Let the meatballs sit in the sauce while you raise the oven temperature to 450.  Drain the moisture and wipe the grease from the baking sheet.  Apply a fresh coat of nonstick spray.
    When oven has reached 450, give meatballs another toss in the bowl, then transfer, sauce and all to the baking sheet.  Bake, on the top rack of the oven for 12-15 minutes.
    Place remaining portion of wing sauce in a small bowl.  Gently insert a celery stick into the top of each meatball.  Using the celery as a handle, pick up the meatball and roll in the remaining wing sauce to coat before plating.  This step is optional, but gives the meatballs a nice final shine.  Serve with low fat blue cheese dressing.
     
    recipe source here

    War on Poverty Continues...


    The War on Poverty has been an ongoing battle for many years. Dating back to President Lyndon B. Johnson in 1964. It was then that Economic Opportunity Act was passed to give more a chance in life. During the era of the Great Society President Johnson placed the government in charge of education and health care to help prevent and stop and hopefully win the battle on Poverty.


    Today the measures that President Johnson achieved are still present in the fields of head start, Job Corps and many other programs The 1980s and 1990s saw a change in the war on poverty and in fact the welfare system was ended by Bill Clinton.


    I believe that there were way to many in the past that lived on the system. I myself went to work at the age of 21 and continue to work and care for our family. There are many though that are not made like me and had lots of problems. In addition, in certain areas there are very few jobs and many that need them. The government as of late has started to cut back on so many places and programs that helped individuals and families.

    What do you think??

    This Bug You May Want To Catch

    Tis the season for cod and flus and washing our hands to keep germs away. Not wanting to catch anything from the sniffles to a virus many will become very aware of germs and not wanting to catch any of them. Armed with alcohol gel and eagerly washing hands with soap and water we strive to keep those germs at bay. What if I told you there was one germ you may want to catch and share with others as well.


    There is one sort of germ that you might not be too worried about catching, however: A Joy Germ!
    A Joy Germ is a little germ of joy that is spread by smiling at people, making people laugh, and generally spreading happiness everywhere you go. Imagine a day where everyone is smiling, laughing and spreading happiness – that’s Joy Germ Day!
    It’s very easy to participate. The first step is to park your cynicism at home. The second step is to go out into the world. The third step is up to you – just feel the joy, and spread it around!

     
    Here are a few ways to catch the Joy bug and spread it around:
     
    • smile for the entire day
    • sit and talk with family or friends
    • let someone in the checkout aisle with fewer items go first
    • get in the kitchen and cook with your kids
    • take a walk
    • make soup and share it with all you love
    • visit or call a sick friend or someone unable to get out
    • volunteer at an animal shelter
    • tell someone you believe in them
    •  


    Natural Tips To Cleaning The Bathroom

     My family is the world to me and I strive to do the best for them. One of the ways that I  try my best to keep them safe, healthy and happy is by using the least chemicals to clean. Here are some of my tips:


    • glass and mirrors can be cleaned with 50/50 vinegar and water mix in a spray bottle and wiped with old rags from cut-up tees or newspapers.
    • microfiber cloths are awesome for cleaning without chemicals. Keep a few around on hand for washing, polishing and drying
    • use a 50/50 vinegar/water solution to clean tile, counters, cabinet fronts, and soap scum in the shower
    • baking soda and water paste will clean stuck on gunk in the shower and tub. If you have a super stuck on stain use vinegar with soda to clean.
    • clean grout with baking soda and undiluted hydrogen peroxide. Scrub with a toothbrush
    • sprinkle baking soda around the inside of the toilet to coat, dump a cup of undiluted white vinegar in the water. Use a toilet brush to scrub and the chemical reaction of the baking soda and vinegar to remove stains and odors (also use on the floor around toilet to clean up that area as well)


    happy bubble bath day


    DIY Bubble Bath for Kids
     
    ½ cup clear or light-colored shampoo
    ¾ cup water
    ¼ teaspoon salt
    Food Coloring (Optional)
    Mix shampoo and water into a medium bowl.
    Add ¼ teaspoon salt. Wait for the mixture to thicken.
    Add a drop of food coloring and stir. Continue to add until you have the color you want.