Custom Search

Saturday, September 3, 2016

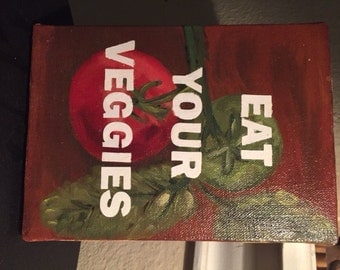
Tips To Get Your Children To Eat Veggies

As a parent we strive  to make sure that they eat nutritious and balanced meals. We can plan and prepare good meals for the family but the problem is that our children may refuse to eat what we serve. Do you try and try and always have problems with getting your child to eat their veggies?? Well, you are not alone. I struggled with this as a parent and finally found some ideas and they have worked for both my grand-children and children. 


One thing that worked for our family was to make a family meal plan together. This way they had input into what they would be eating. They do not have total control as the parents hold that it is only that they feel that they can put in their ideas of what they want as well. 


Create a pact with your child that they are allowed to decide if and how much they eat. While this sounds as if the children are in full control it is a bit different as the pressure is taken off allowing them to want to test and try what they think they do not like. This often means they will want to eat more. 

Place structure in their meal plan by having certain times for meals and snacks. Eating as a family will help build exposure and role modeling. It allows your child to gain an attitude to try new foods like veggies, chicken and fish. Family dining allows children to feel secure and promotes the desire to nutritionally rich foods


Take time to get your child involved in the cooking. There are many things that they can do depending on their age. Letting them see how food is prepared and cooked will challenge to eat more.

Do you have an great ideas?? Would love to have you share them in comments.

Castle "Boo" Park Visit

|Located here in Southern Illinois, what many would consider the capital of southern Illinois, is Carbondale Illinois. About an hour drive from where I live is a large community thriving. Carbondale Illinois is where SIU-C is located at but also a great park for the entire family. 

It seems that on the outskirts of Carbondale is a place full of sword and sorcery. The past of Dungeons & Dragons still lives. The date of existence is August 22nd, 1993 because it was the date that 19 year old Jeremy "Boo"Rochman was involved in a fatal car crash on Giant City Road. Located near the point of the accident now lays a park he would have loved.

Barrett Rochman, Jeremy's dad, the president of an investment firm, bought 3.5 acres across the street from where there home is.The idea was to build a memorial park with a dungeons & dragons theme because Jeremy had loved D&D. Sculptors, carvers and painters were hired to create a Tolkien inspired art out of wood, stone, tile, metal, and cement. 

Art students from near by SIU were employed to help create the magic of the park as well.. In 2005 the park was open to the public. The center point is the castle that is more like an elaborate jungle gym with tunnels, stairs, and bridges. Inside the castle are hidden doors and passage ways for the smaller individuals that visit. Decorating the castle are gargoyles and knights as well as pennants. On top of the castle you will find an ogre as well as look for the collection of swords that belonged to Jeremy.

Just like I would imagine any castle in the day would have had beautiful flowers and trees so does Boo's castle. Along side all the beautiful nature look for all the sculptures of  gremlins, fairies, gnomes as well as a giant sleeping dragon. Wizards can be found here frozen in time. Pegasus and unicorn are among native plantings. Goblins are found in the trees as archers take aim. 

The park may have been created with only local visitors in mind but has become popular with fans worldwide. The park was designed for kids and is perfect place to visit for families. 

We loved our visit to the park. Perfect for adults to relax and kids to play as well. 


Happy Birthday Princess

Celebrated 8th birthday with my princess.


Love How It All Works Together

originally posted here

Peanut Butter Texas Cake

I grew up with many women who made deliciously rich desserts. I guess you could say that I was rather lucky. The first time I was introduced to the chocolaty rich, Texas Cake was by a neighbor lady that often cooked for neighborhood kids.Oh it was so good and now I want to introduce to you a delicious recipe of a Peanut Butter Texas Cake here.


2 c. all-purpose flour
2 c. sugar
1/2 t. salt
1 t. baking soda
1 c. butter
1 c. water
1/4 c. creamy peanut butter
2 eggs, beaten
1 t. vanilla extract
1/2 c. buttermilk
ICEING:
1/2 c. butter
1/4 c. creamy peanut butter
1/3 c. plus 1 T. milk
16-oz. pkg. powdered sugar
1 t. vanilla extract

Sift together flour, sugar, salt and baking soda in a large bowl; set aside. Combine butter, water and peanut butter in a saucepan over medium heat; bring to a boil. Add to flour mixture and mix well; set aside. Combine eggs, vanilla and buttermilk; add to peanut butter mixture. Spread into a greased 15″x10″ jelly-roll pan. Bake at 350 degrees for 15 to 20 minutes, until it springs back when gently touched.
PREPARE ICING:
Combine butter, peanut butter and milk in a saucepan over medium heat; bring to a boil. Remove from heat; stir in powdered sugar and vanilla to a spreading consistency. Spread Peanut Butter Icing over warm cake.

Lemon Buttermilk Sheet Cake


Our family is large, we had 6 children of our own. They in turn have dates or spouses. Then we have been blessed with grand-babies. We love finding reasons to get together. September is perfect for us with several birthdays including my grand-daughter and my own. Cakes are often at feeding a crowd and the sweetness can be enjoyed by all. This beautiful lemon cake is perfect for the warmer days and offers just the perfect flavor that we all loved.

Lemon Buttermilk Sheet CakeRecipe from America’s Test Kitchen Best Summer Desserts found via Our Best Bites
Cake:
2 1/2 cups (10 ounces) cake flour (no substitutions)
1 teaspoon baking powder
1/2 teaspoon baking soda
1/2 teaspoon table salt
3/4 cup buttermilk
3 tablespoons grated lemon zest
1/4 cup freshly squeezed lemon juice
1 teaspoon vanilla extract
1 3/4 cup white sugar
12 tablespoons (1 1/2 sticks) unsalted butter, softened
3 large eggs plus 1 large egg yolk
Glaze:
3 cups (12 ounces) powdered sugar
3 tablespoons lemon juice
2 tablespoons buttermilk
Make sure the oven rack is in the middle position (unless you’ve found that another position works better in your oven for baking) and heat oven to 325 degrees. Grease and flour a 9×13″ baking dish and set aside.
Whisk together the flour, baking powder, baking soda, and salt in a medium bowl. Set aside. In a measuring cup, combine buttermilk, lemon juice, and vanilla. Set aside.
Using a stand mixer fitted with the paddle attachment, beat the white sugar and lemon zest on medium speed until moist and fragrant (about 1 minute). Remove 1/4 cup of the sugar mixture and place it in a small bowl. Cover and set aside.
Add the softened butter to the remaining sugar mixture and beat until light and fluffy (about 2 minutes). Beat in the eggs and yolk, one at a time, until incorporated. Reduce speed to low. Add the flour mixture in 3 additions, alternating with the buttermilk mixture in 2 additions. Mix until smooth (about 30 seconds)
Scrape the batter into the reserved baking pan and smooth out the top. Bake until the cake is golden and a toothpick inserted into the center comes out clean (about 25-35 minutes). Be careful not to over bake. Transfer the pan to a wire rack and allow to cool for 10 minutes.
While the cake is cooling, whisk the glaze ingredients together until smooth. Gently spread the glaze over the cake and sprinkle evenly with the reserved sugar mixture. Allow to cool completely, at least 2 hours.

Friday, September 2, 2016

Chicken Kebabs


School has started nearly every where and if it has not it most likely will be soon. Every year the same sadness but readiness feelings come over me. The fun days of summer where we could plan a day off is gone and the routine of school begins. It is also a bit sad as they grow through the years. So proud of my kids and grand-kids for doing all that they do. 

The weather here is still hot and some days are hotter than others. With the heat still here grilling is still the choice of cooking. .This recipe allows the chicken to stay moist by using a bacon puree. Oh yes that is what I said bacon and puree right next to each other. The kebabs are flavored with paprika and an easy bbq sauce. 


BBQ Chicken Kebabs
Cooks Illustrated

*THE RECIPE CALLS FOR EITHER CHICKEN THIGHS OR BREAST. IF YOU USE BOTH, MAKE SURE TO PUT THEM ON SEPARATE SKEWERS AS THEY WILL COOK AT DIFFERENT RATES.

INGREDIENTS

  • Sauce
  • 1/2cup ketchup
  • 1/4cup light or mild molasses
  • 2tablespoons grated onion (see note)
  • 2tablespoons Worcestershire sauce
  • 2tablespoons Dijon mustard
  • 2tablespoons cider vinegar
  • 1tablespoon light brown sugar
  • Kebabs
  • 2pounds boneless, skinless chicken thighs or breasts, trimmed of excess fat and cut into 1-inch cubes 
  • 2teaspoons kosher salt
  • 2tablespoons sweet paprika
  • 4teaspoons sugar
  • 2teaspoons smoked paprika
  • 2slices bacon , cut into 1/2-inch pieces
  • 412-inch metal skewers

INSTRUCTIONS

  1. 1. FOR THE SAUCE: Bring all ingredients to simmer in small saucepan over medium heat; cook, stirring occasionally, until sauce reaches ketchup-like consistency and is reduced to about 1 cup, 5 to 7 minutes. Transfer 1/2 cup sauce to small bowl and set aside remaining sauce to serve with cooked chicken.
  2. 2. FOR THE KEBABS: Toss chicken and salt in large bowl; cover with plastic wrap and refrigerate for at least 30 minutes and up to 1 hour.
  3. 3. Turn all burners to high, close lid, and heat grill until hot, about 15 minutes. Scrape cooking grate clean with grill brush. Leave primary burner on high and turn off other burner(s).
  4. 4. While grill heats, pat chicken dry with paper towels. Combine sweet paprika, sugar, and smoked paprika in small bowl. Process bacon in food processor until smooth paste forms, 30 to 45 seconds, scraping down bowl twice during processing. Add bacon paste and spice mixture to chicken; mix with hands or rubber spatula until ingredients are thoroughly blended and chicken is completely coated. Thread meat onto skewers, rolling or folding meat as necessary to maintain 1-inch cubes.
  5. 5. Place kebabs over primary burner and grill, covered, turning one-quarter turn every 2 to 2 1/2 minutes until well browned and slightly charred, 8 minutes for breasts or 10 minutes for thighs. (If flare-ups occur, slide kebabs to cool side of grill until fire dies down.) Brush top surface of kebabs with ¼ cup sauce; flip and cook until sauce is brown in spots, about 1 minute. Brush second side with remaining ¼ cup sauce; flip and continue to cook until brown in spots and instant-read thermometer inserted in center of meat registers 160 degrees for breasts and 175 degrees for thighs, about 1 minute longer. Remove kebabs from grill and let rest for 5 minutes. Serve, passing reserved barbecue sauce separately.

Cheesecake


Cheesecake
Food Network and My Kitchen Cafe

Ingredients
Crust:
3 cups finely ground graham crackers (about 40 squares)
2 tbsp. sugar
1 stick unsalted butter, melted


Filling:
1 pound cream cheese, 2 (8-ounce) blocks, softened
3 eggs
1 cup sugar
1 pint sour cream
1 lemon, zested
1 tsp vanilla extract

To prepare crumb crust: In a mixing bowl, combine the crust ingredients together with a fork until evenly moistened. Lightly coat the bottom and sides of a 9-inch springform pan (I used a 10-inch springform pan)with non-stick cooking spray. Firmly press the mixture over the bottom and 1-inch up the sides on the pan, use your fingers or the smooth bottom of a glass. Refrigerate the crust while preparing the filling.
To prepare filling: In a large bowl, beat the cream cheese on low speed for 1 minute just until smooth and free of any lumps. Gradually add the sugar and beat until creamy, 1 to 2 minutes. Periodically scrape down the sides of the bowl and the beaters. Add the eggs, 1 at a time, and continue to slowly beat until combined. Stir in the vanilla and lemon zest. Blend in the sour cream. The batter should be well mixed but not overbeaten. Overbeating incorporates too much air and will cause the cake to puff when baking, then fall and crack when cooling. Pour filling into the crust-lined pan and smooth the top with a spatula.
Bake in a preheated 325 degree oven for 50-55 minutes. The cheesecake should still jiggle slightly, it will firm up after chilling. Be careful not to overcook! Do not do a toothpick test in the cake’s center, this will make a crack. Loosen the cheesecake from the sides of the pan by running a thin metal spatula around the inside rim. Let cool in the pan for 30 minutes. Chill in the refrigerator, loosely covered, for at least 4 hours to set up. Demold and transfer to a cake plate. Slice the cheesecake with a thin, nonserrated knife that has been dipped in hot water and wiped dry after each cut.

Thursday, September 1, 2016

Sweet and Easy Cornbread

September the 1st means a couple of things, tommorow is my grand-daughters birthday and fall will soon be here. Both call for celebrations and I am willing to celebrate by enjoying my day and getting in the kitchen. This recipe offers all those that like a sweeter cornbread exactly what they are looking for. Often cornbread ends up being dry, crumbly and perfect for beans but not exactly what I want to serve alone.


Sweet and Easy Cornbread


1 yellow cake mix
2 Jiffy cornbread mixes
Oil, milk, and eggs according to package directions

Preheat oven according to directions on cake mix box. Combine cake mix and cornbread mixes in a large bowl. Add eggs, oil, and milk according to package directions (replace all water with milk). Mix together according to cake mix directions.


Bake according to directions on cake mix. Usually around 20 minutes for the muffins and 30 for the cake. If you find that it is not done in the center and browning too quickly, cover with foil and keep cooking until middle is done.


*This makes a lot of cornbread and since I don't really like using half a cake mix I usually just make it all and freeze the leftovers. You can either do 24 muffins, 12 muffins and a 9 x13 or a 9x13 and 8x8 pan. *

Lasagna Rolls


3.5 cups Ricotta cheese
2 cups mozzarella cheese
1 egg
2.5 teaspoons italian seasoning
2.5 cups frozen spinach (thawed and drained)
1 box of lasagna noodles (cooked so you don't have any trouble rolling them)
1 large can tomato sauce
1 can diced tomato
1 can tomato paste
seasoning to taste
garlic

Now that you've had a chance to get your ingredients all together, let's start building our rolls.  This is really easy and not super messy so it's a great way to get the kids involved in helping out in the kitchen.  My 10 year old daughter loves to get in the kitchen and help out so I have her measure out ingredients, mix everything and help spread the filling onto the noodles and then the best and most fun part, I love to have her help me roll them.  I'm not only spending good, quality time with her but I'm also teaching her valuable life skills that she'll need when she's older to take care of herself and a family later on.

The first thing I do is get my sauce going on the stove.  Take your can of tomato sauce, diced tomato and tomato paste along with whatever seasoning you like to flavor your pasta sauce.  I generally reach for just good old Italian seasoning and fresh garlic.  I also add a sprinkle of sugar to make it a bit less acidic.  Once that's started, I move on to assembling my filling.

For the filling, you'll take your ricotta, mozzarella, egg, Italian seasoning and if you choose to add spinach you'll add it here as well.  I usually add spinach just because it's a great way to get some greens in without hearing any complaining because you can't hardly taste it!
While you are assembling your filling, now's a good time to boil the noodles so you can roll them without breaking them...you can't really roll a hard lasagna noodle ;)

Take all of your ingredients and combine them into one mixing bowl, make sure everything gets really thoroughly incorporated.  Once you've mixed everything together you just have to spread it out on the noodles, roll them and place them in your casserole dish.

I always put a layer of sauce on the bottom of my casserole dish to help insure the noodles don't stick to the dish.  Then I lay the rolls in the dish, cover with more sauce, sprinkle mozzarella over the top and if you want you can add fresh grated Parmesan cheese on top before you cover it and slide it in the oven.  I cook this for about 45 minutes on 375 and take the foil off at about 35 minutes and let the cheese get nice and golden and bubbly for the last 10 minutes in the oven.


Cooler Days of September Perfect for winter prep

Welcome September!!! September to me is both a month to enjoy with warm-hot temps at the beginning of the month and progressively getting cooler as the month goes on. September is also a month to prepare for winter like the little ant. You may want to put together a winter emergency kit. In my kit I include:

Kerosene Oil Lamps as they offer great light and more than a simple flash light. 


Flash lights should be kept in easy to find places If the power goes out the street lights go out as well. If you live in the country then it is even darker. Batteries should be tested periodically as well. 

Extra batteries for flash lights as well as any device that you may need them for. Everything from tools that are needed in a time of emergency or games for kids take batteries. 


September is a great time to wash winter linens including extra blankets that should be readyin case the heat and electricity goes out Its also a great time to test the electric blankets and heating pads that come in handy in winter. 

Our home is an older house and there are lots of cracks and crevices. Small room heaters come in handy. September is a great time to locate and clean the heaters if needed. 


Season change means its time to change the clothing style as well. Pull the winter clothe out of storage and get them ready to wear. You may need new pieces if children have grown Have pieces wore out?? Time to replace them is now. Check out the thrift store for great deals on winter clothing in warm weather. 

Stock up on cold and flu medicine before it is needed. Use an inventory sheet to keep track of what you all ready have on hand and what you need. Remember to check expiration dates. My daughter likes herbal remedies perhaps you are as well. Do a bit of research and see what you can find that you like


September with the cooler days is a great time to make up a batch of your favorite soup and freeze it. Keep your eyes open for any sales that they have on soup in the coming months as well. Soup is great to keep on hand and makes you feel better with winter colds and blah.

 She has no fear of winter for her household, 
for everyone has warm clothes. (NLT)

What do you do to prepare for fall and winter months?? 

Recipe Haiku


open jar
heat in microwave
lazy she


slice apples
bake in phyllo dough
autumn crisp


orville's bag
three minutes on high
popcorn time


dark roast brew
plus chocolate splash
writer's high

originally posted here

Pumpkin Fritters

Today was a wonderful day to get out there. Temps are down a bit and the day is lovely. When I went to the stores I saw all the awesome fall and harvest time items available to purchase. I just simply can not wait til fall is here. The pumpkin flavor is delicious. You do not have to wait if you make up these pumpkin fritters, welcome fall in with delight.


•one 15-ounce can pumpkin
•¼ teaspoon salt
•1 cup flour
•2 tablespoons butter
•1 egg, beaten
•2 tablespoons vegetable oil
•3 tablespoons sugar
•½ teaspoon ground cinnamon
•1 teaspoon baking powder
•1 teaspoon cinnamon
•MAPLE WHIPPED CREAM
•maple whipped cream
•½ pint heavy whipping cream
•2 tablespoons pure maple syrup
•combine the maple syrup and heavy cream in a mixing bowl and mix on high until stiff peaks form
•a hint for making real whipped cream is to put the mixing bowl in the freezer for a few minutes before you start mixing
Instructions
1.In large bowl, combine pumpkin, flour, egg, 1 tablespoon sugar, baking powder and salt.'
2.Heat 1 tablespoon butter and 1 tablespoon oil in a large skillet over medium heat.
3.Drop spoonfuls of mixture into pan and lightly flatten with a spatula.
4.Cook until golden, about 4 minutes per side.
5.Cook in two batches
6.In small bowl, combine remaining sugar with cinnamon and sprinkle over hot fritters before serving

Wednesday, August 31, 2016

The heat in our area has been rough, with everyone stating how hot it is. We have yet to acquire an a/c hoping that we will be able to make it through the summer without one. School has started again and often that means that summer will be ending soon. All I know is that the heat did not get the memo. That leaves the desire for cool meals and easy lunchbox meals. 


Individual Seven-Layer Dips


Makes about 8 individual dips

1 (16 ounce) can refried beans
1 (1 ounce) package taco seasoning
1 cup guacamole
1 (8 ounce) container sour cream
1 cup chunky salsa or pico de gallo
1 cup shredded cheddar or Mexican blend cheese
2 Roma tomatoes, diced
1/2 bunch of green onions, sliced
1 (2.25 ounce) can of sliced olives, drained
9 ounce plastic tumblers
tortilla chips


In a small bowl mix taco seasoning with refried beans. Some people prefer to mix their taco seasoning with the sour cream layer but I wanted a bright white layer so I did it with the beans.

Here's how the layers are assembled:
Layer 1: beans and taco seasoning
Layer 2: sour cream
Layer 3: guacamole
Layer 4: salsa or pico de gallo
Layer 5: cheese
Layer 6: tomatoes
Layer 7: green onions and olives

In each plastic glass, layer about 2 Tablespoons of the beans, followed by 2 Tablespoons of sour cream, 2 Tablespoons of guacamole, 2 Tablespoons of salsa or pico de gallo, and 2 Tablespoons of cheese. Make sure you drain your salsa or pico to get the excess liquid out before you pour it on. Then top with about 1-2 teaspoons of tomatoes, olives, and green onion (If making ahead of time, wait to add these toppings until shortly before serving).

Garnish with one tortilla chip. Store in the refrigerator until serving and serve with chips. Makes around 8 individual dips.

The Chocolate Factory


One of the sweetest places you may find is not only located in Illinois but also right here in the forest. The Chocolate Factory offers sweets that are sugar free or full of sugar, sweets for holidays or every day, and sweets that are custom made for you. Live close by you can stop in for a bit of ice cream but if you live farther away they have an online order form and will send your choice of chocolate home to you.


Look how precious these scarecrow look. All made out of chocolate and so delicious. Where would you start with a bit of his hat or foot?? It makes no difference all is made tasty. Don't worry as chocolate helps fight tooth decay. An extract of cocoa has been found to be more effective than flouride.


So if you are in Southern Illinois stop by for a visit at The Chocolate Factory on Illinois Route 146 Trail of Tears in Shawnee National Forest. It is across from Dixon Springs State Park and a short drive from Lake Glendale Recreations Area.

Not in the area visit their website The Chocolate Factory and find them on face book as well. As always you can find us on facebook at Annies Home


Tuesday, August 30, 2016

SlowCooker Hawaiian Chicken (Freezer Recipe)

This recipe is both a slow cooker recipe as well as one that can be frozen easily.


1lb boneless, skinless chicken breasts, cut into bite-sized pieces
1 fresh pineapple, stalk, skin, and core removed and fruit cut into bite-sized pieces
2 tablespoons light brown sugar
2 tablespoons low sodium soysauce
1 gallon-sized plastic freezer bag
  1. Label your freezer bag.
  2. To your freezer bag, add pineapple, brown sugar, soy sauce, and chicken breasts. (Add the chicken breasts to the bag last) 
  3. Remove as much air from the freezer bag as possible, seal, and lay flat in your freezer.

Cook

  1. The night before cooking, move frozen bag to your refrigerator to thaw.
  2. The morning of cooking, pour contents of freezer bag into your slow cooker and cook on “low” setting for 3-6 hours, or until chicken is cooked through and tender.
shared at 

Monday, August 29, 2016

Win a Prize Pack from Entenmans


Its back to school and for many that means morning wake-up calls. Why is it I say that, because for many later wake=ups are simply part of summer time. Now that earlier times are back breakfast time has become shorter and sometimes it is great to have breakfast on the go. Would it not be great if someone would be kind enough to give us a great breakfast idea?? Well, entenmans has many and you may just want to try them out. Currently the blog Heck of a Bunch is hosting giveaway where  you can win all in the picture above. Want a chance to win the prize in the picture above?

Time To Play With The ABC's

I have shared many times that I love to teach my children through play. The ABC's is no different. Maybe you have taken the time to sing the ABC song with your child. In this post you may get a few more ideas.

Enjoy a bowl of alphabet soup and take a turn sharing each letter before eating every bite. After all it will provide a great conversation while eating. 


I recently saw a set of print blocks with the alphabet on it at the local dollar store. You may want to see if you can purchase some. One way of learning is to have it in their environment. Allow them to play with the stamps while they learn the letters.


Art is a great way to learn the alphabet through apple prints, aluminum foil, alphabet pasta, or foam shapes


B - beans, beads, bubble wrap, buttons, 
C - cotton balls, corn kernels, cinnamon (ground), coffee (ground), car stickers, construction paper (torn)
D - dirt, dots (stickers or do-a-dot markers), daisy petals, foam dinosaur shapes
E - egg shells, foam egg shapes, envelope strips, eyes (wiggly), earth stickers
F - feathers, foam, puffy finger paint, flower petals, fruit loops, flower stickers or stamps
G - glitter, grass, glue (dried out glue is raised), gems, ginger (ground)
H - hay, hair heart stickers or stamps
I - ice cube prints, ivy, ice cream stickers
J - jelly beans, jewels
K - kool-aid, kleenex, old or plastic keys, kite stickers
L - leaves, lasagna noodles, lace
M - macaroni, m&m's, mini marshmallows, play money
N - noodles, netting fabric, number stickers/stamps, nickles (play money, stickers or stamps)
O - oatmeal, owl feathers (brown feathers will do) cheerios (o shape)
P - pasta, pom-pom balls, play-doh, popcorn, pipe cleaners, penguin stickers, paper (torn), pumpkin seeds, pennies (play money, stickers or stamps),  packing peanuts
Q - q-tips, quarters stamped in paint, quilted fabric
R - rainbow colored rice, ribbon
S - seeds, sand, sequins, sprinkles, stickers, stamps, shapes, snowballs (cotton), spaghetti (cooked), string, shells, sponge paint
T -  twigs, tissue paper
U - uniform (fabric pieces in a plaid design), umbrella stickers, unicorn stickers
V - vegetable prints, velcro, velvet, vehicle stickers
W - wagon wheel pasta, wooden sticks, watermelon seeds
X - x's from alphabet pasta, bones stamped in white paint (x-ray) dirt or tape (for x marks the spot)
Y - yellow yarn
Z - zeros (cheerios), zippers (fabric), zig zags (cut from paper)

original idea found here

whats for dinner