Custom Search

Saturday, April 2, 2016

We All Deserve Love


World Autism Awareness Day occurs on April 2nd every year. The day aims to increase people’s awareness about people, especially children, with autism. Educational events for teachers, health care workers and parents, as well as exhibitions showcasing work created by children with autism.

  1. AWARENESS: We have become aware that the diagnoses of autism are on the rise.
    Practicality and significance: More and more people of all ages and backgrounds are affected by this disorder, so it is more likely to touch someone you know.
  1. ATTENTION: Now that we have become aware, we can pay attention to the signs of autism.
    Practicality and significance: Autism can only be diagnosed by observation, so it is up to everyone in the child’s life to be watchful.
  1. ACTION: Once we are aware, we can report what we see and hear to the child’s caregivers, educators, doctors, and family and friends.
    Practicality and significance: The earlier a diagnosis of autism is established, the sooner treatment which involves the help of all of the significant people in the child’s life can begin for the best quality of life.
  1. ACCEPTANCE: While treatment helps the child progress through life, autism presents challenges throughout the lifespan. We need to be sensitive to the differences that people with autism have.
    Practicality and significance: Our focus is on the person, not the disability.
  1. ADVOCACY: When we have become fully aware, attentive, action-oriented, and accepting of the person with autism, we must advocate for them.
    Practicality and significance: At the heart of autism is difficulty relating to other people in society and trouble communicating. Therefore, people with autism rely on us to be their voices and their supporters

It so happens that World Autism Awareness Day also falls on Love Our Children Day which occurs the first Saturday of April each year. This day was created to acknowledge the value of children and to educate parents on the importance of giving them love, protection and respect. These three essential elements when given to children can help them to become strong and successful adults. Helping our children stay healthy and happy they can feel as if they belong and grow up to become strong and successful adults. The first annual National Love Our Children Day was held on April 3, 2004, by Love Our Children USA 

Find out what you can do to show all our children we love them. For ideas how to get involved visit here


Peanut Butter and Jelly Day

Oh my was it beautiful where you were at today?? If the wind had not been blowing quite as strong as it was it would have been a perfect day. The sun shining on this first Saturday of April 2016. I look forward to many more awesome days. Days like this remind me of my childhood spending time outside. We would enjoy Peanut Butter and Jelly sandwiches and spend the day outside riding bikes, playing ball and simply enjoying life. It was a time where there was no real stress and we had no bills or job to worry about. In honor of this delightful memory I am sharing some delicious peanut butter and jelly sandwiches perfect for adults. Enjoy:


Many of us love bacon and either loved or knew someone who loved Elvis so this first sandwich is dedicated in honor of Love.


Fried Peanut Butter and Bacon Sandwich 


Peanut Butter , Honey and Argula Sandwich


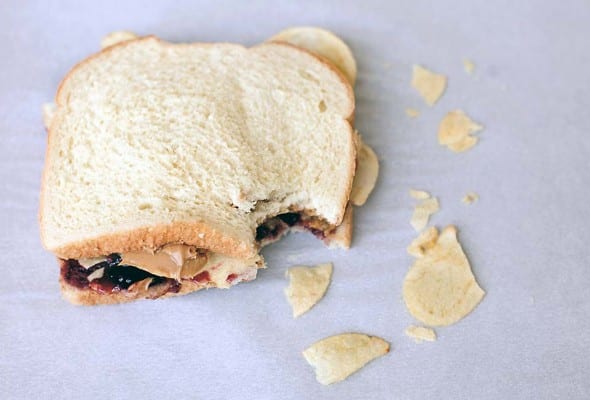
Last who does not remember putting chips on their sandwich. While it may not have been a peanut and butter sandwich there is a recipe just for that check it out here

Did You Know
Today, April 2nd, 2016 is International Pillow Fight Day. Do you remember those pillow fights you have been in. It may have been in gradeschool, highschool, your college days or even a family pillow fight. Yes through the years everyone can enjoy a good pillow fight. Today around the world there were pillow fights to have been found, In cities near and far the 7th annual International Pillow Fight Day was taking place. Tens of thousands of people in 100+ cities participated. You can find more information at Pillow Fight . com


Friday, April 1, 2016

Did you know Florida Tomatoes

One of my favorite sandwiches is the famous BLT. Bacon, lettuce and tomato. Each part has to be just right. I often order extra bacon so that I can savor it , the lettuce I want a good leaf but not to much as like I said I love the bacon. The tomato has to be a good slice and don't forget the bread. Not to thick sliced but thick enough. This recipe offers even more with a taste like no other. Sour dough bread has a taste that no other bread offers and this recipe has tomato built right in. 


1 1/2 cups sourdough starter
  • 1 cup warm water (110 degrees F/45 degrees C)
  • 1 (.25 ounce) package active dry yeast
  • 1 cup warm tomato juice
2 teaspoons white sugar
  • 1 teaspoon salt
  • 7 cups all-purpose flour


  1. Dissolve yeast in 1 cup warm water, set aside.
  2. In large bowl; mix starter and tomato juice. Add yeast mixture, salt, sugar and stir well.
  3. Add 1 cup of flour at a time and beat well to develop the gluten. When a stiff dough forms, turn out onto a floured surface and knead until smooth and elastic, adding the last 1 cup of flour as you go.
  4. Turn into greased bowl and lightly grease top, cover with towel and place in draft free area for 2 hours. Will double in bulk.
  5. Punch down and divide dough in two, form into rounds and place each on a baking sheet that has been sprinkled generously with cornmeal.
  6. Let rise 1/2 hour, rub top lightly with flour and slash with sharp knife. Bake at 350 degrees F (175 degrees C ) for 45-60 minutes or until bottoms are lightly browned when checked.
  7. For a soft crust, cool under a clean dishtowel. For a harder European type crust, cool without


Safety Alert
I was not aware until I started to research Florida tomato's. One thing I did learn made me very concerned. The Huffington Post reported that there is a dark secret in part of tomato farming. It seems that there are thousands of farm laborers work under slavery like conditions today in the U.S. and Mexico to grow tomatoes and other produce. 

January 2014 the Coalition of Immokalee Workers (CIW) was presented with the 2014 Presidential Medal for Extraordinary Efforts to Combat Human Trafficking. This group helped workers battle back against slave like working conditions of American tomato farmers. The Coalition of Immokalee workers is not for profit based in Immokalee, Florida. It is a coalition of tomato farmers who have banned together to create and work toward safe and fair working conditions for all workers in Florida's agricultural industry .

Before the coalition some of the harshest and brutal treatment was offered to the workers in the tomato fields. A third of all U.S. tomatoes are grown in this area. Florida helps provide about 90% of our winter tomatoes so workers are very much needed in this area. Other crops grow here as well and they all need workers in the field to harvest and care for the crops. Keeping these workers is not always easy and slavery like conditions have spurred up. In the past 20 years the Justice Department has prosecuted slavery cases in this area of Florida.

Over a thousand individuals have been freed from agricultural slavery rings in Florida during the last 10 to 15 years. Stories of brutal beatings, shackles and chains, no pay for work done, and over crowded houses where workers were made to stay and pay for rent. There are also stories of harsh work conditions of working in fields with no shade or breaks and working long hours. There was no way to escape it seemed 

Tomato pickers earn two cents for every pound they pick. Making the owner of the field more money as the tomatoes are sold for $1 to $4 a pound. Companies have banned together to pay a penny more per pound that goes to the workers. This allows a raise in pay for the pickers which can help them out of the large debt that they owe and keeps them enslaved to the owners. 

Look for the fair food program label that tells you that they are a fair food 

You can also join a local Fair Food Group. To learn more about the plight of tomato farmers, check out the film Food Chains and the book Tomatoland by Barry Estabrooks.


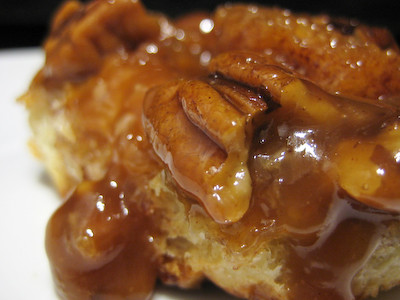
Pecan Honey Sticky Buns

Pecan Honey Sticky Buns
from Baking: From My Home to Yours, by Dorie Greenspan


For the Glaze:
1 cup (packed) light brown sugar
1 stick (8 tablespoons) unsalted butter, cut into 4 pieces
1/4 cup honey
1-1/2 cups pecans (whole or pieces) (I used 1 cup)

For the Filling:
1/4 cup sugar
3 tablespoons (packed) light brown sugar
1 tablespoon ground cinnamon
3 tablespoons unsalted butter, at room temperature

For the Buns:
1/2 recipe dough for Golden Brioche loaves (see below), chilled and ready to shape (make the full recipe and cut the dough in half after refrigerating it overnight)

Generously butter a 9-x-13-inch baking pan (a Pyrex pan is perfect for this).

To Make the Glaze:
In a heavy-bottomed saucepan, bring the brown sugar, butter, and honey to a boil over medium-low heat, stirring frequently to dissolve the sugar. Pour the glaze into the buttered pan, evening it out as best you can by tilting the pan or spreading the glaze with a heatproof spatula. Sprinkle over the pecans.

To Make the Filling:
Mix the sugars and cinnamon together in a bowl. If necessary, in another bowl, work the butter with a spatula until it is soft, smooth and spreadable.

Golden Brioche Dough (this recipe makes enough for two brioche loaves. If you divide the dough in half, you would use half for the sticky buns, and you can freeze the other half for a later date, or make a brioche loaf out of it!):

2 packets active dry yeast (each packet of yeast contains approx. 2 1/4 teaspoons)
1/3 cup just-warm-to-the-touch water
1/3 cup just-warm-to-the-touch whole milk
3 1/3 cups all-purpose flour
2 teaspoons salt
3 large eggs, at room temperature
1/4 cup sugar
3 sticks (12 ounces) unsalted butter, at room temperature but still slightly firm

To Make The Brioche:
Put the yeast, water and milk in the bowl of a stand mixer and, using a wooden spoon, stir until the yeast is dissolved. Add the flour and salt, and fit into the mixer with the dough hook, if you have one. Toss a kitchen towel over the mixer, covering the bowl as completely as you can-- this will help keep you, the counter and your kitchen floor from being showered in flour (I did not find the towel necessary). Turn the mixer on and off a few short pulses, just to dampen the flour (yes, you can peek to see how you're doing), then remove the towel, increase the mixer speed to medium-low and mix for a minute or two, just until the flour is moistened. At this point, you'll have a fairly dry, shaggy mess.


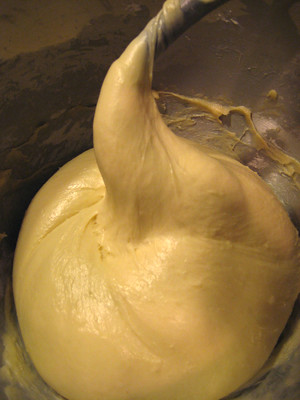
Scrape the sides and bottom of the bowl with a rubber spatula, set the mixer to low and add the eggs, followed by the sugar. Increase the mixer speed to medium and beat for about 3 minutes, until the dough forms a ball. (I never put my KA on anything higher than speed 4, since I was worried something horrible would happen - KA does not recommend using it on speeds higher than 2 with the dough hook). Reduce the speed to low and add the butter in 2-tablespoon-size chunks, beating until each piece is almost incorporated before adding the next. You'll have a dough that is very soft, almost like batter. Increase the speed to medium-high (again, I only did this on speed 4) and continue to beat until the dough pulls away from the sides of the bowl, about 10 minutes.


Transfer the dough to a clean bowl (or wash out the mixer bowl and use it), cover with plastic wrap and leave at room temperature until nearly doubled in size, 40 to 60 minutes, depending upon the warmth of your room.

Deflate the dough by lifting it up around the edges and letting it fall with a slap to the bowl. Cover the bowl with the plastic wrap and put it in the refrigerator. Slap the dough down in the bowl every 30 minutes until it stops rising, about 2 hours, then leave the uncovered dough in the refrigerator to chill overnight. (After this, you can proceed with the recipe to make the brioche loaves, or make the sticky buns instead, or freeze all or part of the dough for later use.)

To Shape the Buns:
On a flour-dusted work surface, roll the chilled dough into a 16-inch square. Using your fingers or a pastry brush, spread the softened butter over the dough. Sprinkle the dough with the cinnamon sugar, leaving a 1-inch strip bare on the side farthest from you. Starting with the side nearest you, roll the dough into a cylinder, keeping the roll as tight as you can. (At this point, you can wrap the dough airtight and freeze it for up to 2 months . . . . Or, if you want to make just part of the recipe now, you can use as much of the dough as you'd like and freeze the remainder. Reduce the glaze recipe accordingly).

With a chef's knife, using a gentle sawing motion, trim just a tiny bit from the ends of the roll if they're very ragged or not well filled, then cut the log into 1-inch thick buns. (Because you trim the ragged ends of the dough, and you may have lost a little length in the rolling, you will get 15 buns, not 16.) Fit the buns into the pan cut side down, leaving some space between them.

Lightly cover the pan with a piece of wax paper and set the pan in a warm place until the buns have doubled in volume, about 1 hour and 45 minutes. The buns are properly risen when they are puffy, soft, doubled and, in all likelihood, touching one another.


Getting Ready to Bake:
When the buns have almost fully risen , center a rack in the oven and preheat the oven to 375 degrees F.

Remove the sheet of wax paper and put the pan on a baking sheet lined with parchment or a silicone mat. Bake the sticky buns for about 30 minutes, or until they are puffed and gorgeously golden; the glaze will be bubbling away merrily. Pull the pan from the oven.

The sticky buns must be unmolded minutes after they come out of the oven. If you do not have a rimmed platter large enough to hold them, use a baking sheet lined with a silicone mate or buttered foil. Be careful - the glaze is super-hot and super-sticky.

Yield: 15 buns

I borrowed this recipe it is a few years old but I wanted to show tribute to my grand-mother. She would not follow a recipe but she did make some of the most delicious cinnamon rolls. Yummy!!! I hope you enjoy get out there and do something fun. After all, today, April 1st is dedicated to have fun day. 

Thursday, March 31, 2016

Memories of 4H and snapdragons

I grew up in a rural area. That was where I enjoyed the first 12 years of my life before moving. It was a great place to live and I found out the fundamentals of life. One of which was belonging to a 4H club. I had many projects and scored many blue ribbons as well as went to state on more than one occasion with my flower projects. Snap-dragons became one of my favorite flowers during that time. As they were the flowers that I would plant, prepare, cut and be judged on. Beautiful snapdragons.


Snapdragons are full of color and are mid sized plants. They balance tall background plants quite well and shorter bedding plants can be placed in front as well. Snapdragons come in various sizes from dwarf, intermediate and tall flowering stems. One color you may not find snapdragons in is blue. At the tallest point snapdragons can reach 3 feet tall or be as short as 6 inches.


Snapdragons are hardy enough to handle frost and can be planted early or stay in garden late. They should be planted in full sun location with well draining soil. Clip the top stem and along long side shoots to urge more flowers to grow and be attractive as well. Water regular with first few weeks soil staying moist.


Good points about snapdragons include the fact that they are deer resistant and grow well in sunny areas where animals are prone to nibble. For this reason planting snapdragons in the garden may help keep the pests from nibbling.


Snapdragons often have a pleasant scent and with their showy blooms they make awesome arrangements for inside. 

Mud Pie and a bit of Blogger Trivia

Recently I had a lady that I cared for that loved coffee. The problem was that due to her medication she could not have decaf coffee. As you may know we live in a grand world where there are substitutes for things that we love. So yes there is decaf coffee. Therefore there is decaf coffee flavored ice cream if not found on shelves near you then make it up yourself.

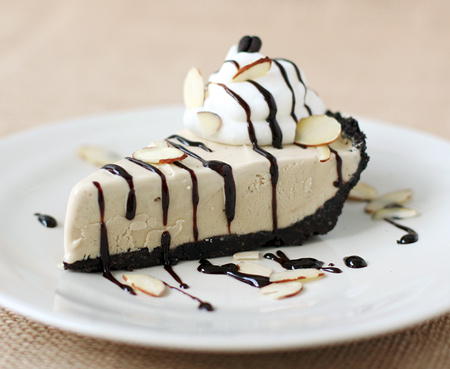
MudPie is a coffee ice cream based pie with a chocolate crust, topped with whipped cream, fudge sauce, and almonds. It is one of my mothers favorite pies the next being rocky road ice cream. So in order to make this delicious pie we had to of course have coffee flavored ice cream that was decaf. 

So whether you need decaf or regular is your choice. You may be able to find them on the market or make your own. You can also find pre made oreo pie crust. The ice cream should be able to soften for just a bit, spread it into the crust. Refreeze, and 30 minutes later ah la you have a delicious dessert. 

Mud Pie with Homemade Decaf Coffee Ice Cream

Makes one 9" pie (about 8 servings).
Ice cream recipe adapted from Simply Recipes.

Ingredients:

Ice Cream:
1 1/2 cups whole milk
3/4 cup sugar
1 1/2 cups whole decaf coffee beans
Pinch of salt
1 1/2 cups heavy cream
5 large egg yolks
1/4 teaspoon vanilla extract
1/4 teaspoon finely ground coffee
Crust:
1/4 cup almonds, finely ground
6oz. chocolate wafer or oreo cookies
3 tablespoons butter, melted
Garnish:
Chocolate sauce
Sliced almonds, lightly toasted
Whipped cream

Directions:

To prepare ice cream, heat the milk, sugar, whole coffee beans, salt, and 1/2 cup of the cream in a medium saucepan until it is quite warm and steamy, but not boiling. Once the mixture is warm, cover, remove from the heat, and let steep at room temperature for 1 hour.
Pour the remaining 1 cup of cream into a medium size metal bowl, set on ice over a larger bowl. Set a mesh strainer on top of the bowls. Set aside.
Reheat the milk and coffee mixture, on medium heat, until again hot and steamy (not boiling!). In a separate bowl, whisk the egg yolks together. Slowly pour the heated milk and coffee mixture into the egg yolks, whisking constantly so that the egg yolks are tempered by the warm milk, but not cooked by it. Scrape the warmed egg yolks back into the saucepan.
Stir the mixture constantly over medium heat with a heatproof, flat-bottomed spatula, scraping the bottom as you stir, until the mixture thickens and coats the spatula so that you can run your finger across the coating and have the coating not run, about 10 minutes.
Pour the custard through the strainer and stir it into the cream. Press on the coffee beans in the strainer to extract as much of the coffee flavor as possible. Then discard the beans. Mix in the vanilla and finely ground coffee, and stir until cool.
Chill the mixture overnight in the refrigerator, then freeze it in your ice cream maker according to the manufacturer's instructions.
While ice cream is churning, prepare the crust. Combine almonds and cookies in a food processor, and pulse until finely ground. Add melted butter and stir until combined. Mixture should be the consistency of wet sand. Dump into a 9" pie dish and firmly press into bottom and sides.
As soon as your ice cream is the consistency of soft serve, remove from ice cream maker and spread into crust. Cover and freeze until firm (at least 4 hours).
When ready to serve, run a knife under hot water for 30 seconds (it'll make cutting much easier) before cutting. Drizzle with fudge sauce, and top with a dollop of whipped cream and sliced almonds.

Blogger Trivia


If you have ever been inside of a chemistry room then I am sure that you know what a bunsen burner is. It is named after Robert Bunsen and is a common piece in any lab. It produces a single open gas flame, which is used to heat, sterilize and combustion. Whether the gas used is methane or propane, butane or mix of both. 


Sunday Potatoes and Noodle Pie


Today, March 31st is the day to honor two staples that were found on my child hood table. Potatoes and Noodles. Both starches and oh so yummy. So I located a great meal plan for all of us to enjoy with potatoes and chicken noodle meatloaf.

Sunday Potatoes

5 pounds potatoes, peeled and cubed
1 cup sour cream
2 (3 ounce) packages cream cheese, softened
3 tablespoons butter or margarine, divided
1 teaspoon salt
1 teaspoon onion salt
1/4 teaspoon pepper

cook potatoes as normal. In a large mixing bowl, mash potatoes. Add sour cream, cream cheese, 2 tablespoons butter, salt, onion salt and pepper; beat until fluffy. Transfer to a greased 2-qt. baking dish. Dot with the remaining butter. Bake, uncovered, at 350 degrees F for 20-25 minutes or until heated through.


NOODLE PIE
recipe source here

serving
One-Half Lb. American Beauty Egg Noodles
3/4 lb. veal or beef, ground
1/2 cup milk
Minced onion, if desired
3/4 lb. pork, ground
1/2 cup bread crumbs
1 egg
Salt and pepper to taste

ingredients
Combine meat loaf ingredients and mix thoroughly. Press mixture in a thick layer onto the sides and bottom of a pie pan. Place in oven at 359 degrees F. and bake 40 to 50 minutes. Then place on top of meat loaf the noodles, which have been cooked until tender in boiling salted water, and drained. Dot noodles with butter and return to oven for a few minutes before serving. Serve this dish in pie-shape cuts. A tomato, cheese or mixed vegetable sauce makes a fitting accompaniment for this meal. Serves six to eight persons.

Wednesday, March 30, 2016

Nature Begs For You


Living here in Southern Illinois we often take for granted the beauty that it has to share. The Shawnee National Forest is one of those nature sites where beauty can be found in abundance. The parks are large and the beauty is grand.


Whatever your park looks like where you are located at take the time to take a walk

Ham Bone Soup in a Train Dining Car

Easter time often sees us preparing a full course holiday ham dinner for our family and friends. I love to share holidays it is a tradition with our family and ham is very versatile. After the dinner is over there are many dishes that can be made from the left over ham not to mention the sandwiches. If you cooked ham this Easter and now the ham is gone and all you have left is the bone this recipe is for you.


  A ham bone is a valuable piece of the ham. Some individuals do not know this and throw the ham bone away. DON"T DO THAT!!!! Ham bones can be used to make a nice ham stock or can be used in a number of tasty soups. It helps add flavors as it simmers away. On the last day of March a good and yummy pan of ham bone soup would taste amazing. 

Using onion, carrot and celery with some stock will make a good start at a delicious bowl of soup. Throw in a few herbs, fresh or preserved your choice and a few green veges and let it all simmer. In fact check out the following recipe: 


  • 1 tablespoon olive oil
  • 1 onion (chopped)
  • 1 carrot (chopped)
  • 2 stalks celery (chopped)
  • 2 cloves garlic (chopped)
  • 4 cups ham broth or chicken broth or chicken stock
  • 1 cup lentils
  • 2 cups ham (diced)
  • 1 ham bone (optional)
  • 1 teaspoon oregano
  • 1 bay leaf
  • 1 teaspoon thyme
  • pepper to taste
  • 1 bunch spinach (rinsed and trimmed)

  1. Heat the oil in a large sauce pan.
  2. Add the onions, carrot and celery and saute until tender, about 10-15 minutes.
  3. Add the garlic and saute until fragrant, a few minutes.
  4. Add the stock, lentils, ham, ham bone, oregano, bay leaf and thyme and simmer, covered on low heat for an hour.
  5. Remove from heat and stir in the spinach.

Slow Cooker: Optionally implement steps 1-3, place everything except the spinach in the slow cooker and cook on low for 6-10 hours or high for 2-4 hours before adding the spinach.
recipe source here


Once upon a time a recipe like this may have been served in the dining car on a train as you traveled to your destination. While many do not travel this way any longer it has always been an interest of mine 

Tuesday, March 29, 2016

Rationing of Meat and Cheese made Egg Salad Important


During WWII rationing of meat and cheese was an important part o life on the US Home Front. This system was often changing and complex.

The US government would produce meat and cheese for her civilians and military as well as for allies. World War I had seen its share of food shortages, hoarding, escalating prices and rushes on stores. In order to cut down on these behaviors during WWII the government would reduce deliveries to stores an restaurants, instituted price controls and urged people to voluntarily reduce usage.

March 29th 1943 The U.S. followed British and instituted a ration system on meats and cheeses. Rationed meats included beef, pork, veal, lamb and tinned meats and fish. Poultry, eggs, fresh milk and spam were not rationed. Rations on cheeses started on hard cheeses and later expanded to cream and cottage cheeses and to canned evaporated and condensed milk.


Rationed books contained blue stamps for processed foods and red stamps for meat and 4 ozs of cheese a week. Stamps were printed with a number for point value and a letter to with rationing period. Newspapers shared rationing calendars that helped make sure the stamps were current and how long. Stamps had to be tore off in front of the grocer and were good for one, two, five or eight points. There was no change given.


Each cut of meat was assigned a point per pound. This was not based on price or quality but on scarcity. The point values would change as supply and demand changed. Kidney, liver, brain and tongue had little use for the military so they were always low. Housewives learned to make do with less meat. They used chicken and rabbit that they raised in their back yards. Fishing also became a way to gather meat. "Meatless Tuesdays" sprung up and recipes for meatless recipes would show up in newspapers and magazines.


How would you like to deal with meat and cheese rationing? One way would be to make Egg Salad.


Place eggs in a saucepan and cover with cold water. Bring water to a boil; cover, remove from heat, and let eggs stand in hot water for 10 to 12 minutes. Remove from hot water, cool, peel and chop. In a large bowl, combine the egg, mayonnaise, mustard, dill, paprika, onion and salt and pepper.

Eiffel Tower Day and a Dessert as Yummy

The Eiffel Tower is a wrought iron lattice tower located in Paris France. The engineer Gustave Eiffel constructed the tower in 1889 for the World Fair. Named after the engineer in charge the Eiffel Tower has become a global icon in France. The tallest tower in Paris and the most visited paid monument in the world around 7 million people visited the tower in 2011. 

Standing the same height as a 81 story building the Eiffel Tower has a square building that measure 410 feet on one side. The tower has three levels that visitors can see. With restaurants on the first and second floor the top level of the platform is 906 feet above the ground. From ground to first level there are over 300 steps. There are another 300 steps from first level to second level. There is a elevator or staircase to each level

On March 31, 1889, the Eiffel Tower is dedicated in Paris in a ceremony presided over by Gustave Eiffel, the tower’s designer, and attended by French Prime Minister Pierre Tirard, a handful of other dignitaries, and 200 construction workers


To celebrate Eiffel Tower day I though we would have to share such a delicious and superior recipe. Today is lemon and orange day so why not share the following beautiful cake recipe. 


Meyer Lemon-Olive Oil Chiffon Cake

Makes 1 cake
2 1/4 cups (279 grams) cake flour
1 tablespoon (15 grams) double-acting baking powder
1/2 teaspoon (3 grams) salt
6 Meyer lemons (1 pound)
1/4 cup water (2 ounces/59 grams) or enough water needed to add to the lemon juice to get to 3/4 cup total
1 1/2 cups (306 grams) granulated sugar
7 large egg yolks
1/2 cup (207 grams) extra-virgin olive oil
2 teaspoons (10 grams) vanilla bean paste
10 large egg whites
1 teaspoon (4 grams) cream of tartar
For the lemon glaze:
2 cups (254 grams) confectioners' sugar
4 tablespoons milk, or more as needed
Zest of 1 Meyer lemon
Preheat the oven to 325°F and position an oven rack in the center of the oven.
Place a sheet of parchment paper on a work surface and sift the flour, baking powder, and salt onto it. Set aside.
Zest the Meyer lemons. Squeeze the juice and strain into a glass measuring cup. You should have about 1/2 cup. Add enough water to make 3/4 cup. Set aside.
Pour the sugar into the food processor and process for about 30 seconds until it is light and fine. Scoop about 1/2 cup of the processed sugar into a small container and set aside.
In the bowl of a stand mixer fitted with a whisk attachment (or if you are using a handheld mixer, in a mixing bowl), combine the remaining 1 cup sugar and the egg yolks and mix at medium speed for about 3 minutes, until it is thick, light in color and texture, and creates ribbons in the bowl when the whisk is lifted. Add the oil and vanilla bean paste and mix until well combined.
Add 1/3 of the flour mixture and half the juice mixture, and mix to combine. Add another 1/3 of the flour mixture and the juice and zest mixture and mix to combine, and then the remaining flour, mixing to combine — always ending with flour possible when making a cake. Pour the mixture into a large mixing bowl, scraping the bottom, and set aside. Clean the stand mixer bowl and whisk (or detach the handheld mixer blades and clean them and the bowl) with hot soap and water and dry very well, making sure there's not even a speck of grease on anything.
Return the bowl and whisk attachment to the stand mixer (or reassemble the handheld mixer and set up the mixing bowl), add the egg whites, and mix at medium speed until they are foamy. Add the cream of tartar, and mix at medium speed until the mixture forms soft peaks. Add the remaining sugar, a little at a time, and beat the whites until they hold stiff and glossy peaks (see Recipe Notes).
Stir 1/3 of the whites gently into the batter to lighten it. Fold in half of the remaining whites until there are a few streaks remaining. Fold in the last of the egg whites just until mixed.
Carefully spoon the batter into an ungreased 10- by 4-inch tube, with feet and an ungreased removable bottom. The batter should come about 3/4 of the way up the sides.
Bake for 50 to 55 minutes, or until a tester or toothpick inserted into the center comes out clean.
With oven mitts, invert the pan immediately onto a cooling rack. Let the cake cool completely in the pan.
When ready to serve, turn the cake upright on the rack, and run a thin flexible knife or offset spatula around the outer and inner edges of the pan. Turn the cake out of the pan: Place a serving plate on top of the pan and, pressing the plate firmly with one hand, invert the whole thing with the other, allowing the cake to release onto the plate.
Prepare the glaze: In a small bowl, whisk the sugar, cream, and lemon zest until blended. Drizzle liberally over the cake, letting it drip.

Recipe Notes

  • The Meyer lemon is a hybrid variety of lemon that is sweeter and less acidic than other lemons and very fragrant. It is in season from October through May. It is named for the importer who brought it to the U.S. from China in the early 20th century.