Growing up in the '70s was a bit different than this day and age but the fig newton was just as loved then as it is now.
Whether you loved 'em or you hated 'em you most likely remember 'em. The newton was a pretty popular cookie when I was a kid and has been for over a century. It was during the 19th century that physicians began to promote increase in biscuits and fruit in the diet to help remedy digestive problems. Fig rolls hit the scene in 1891 Charles Roser would invent an easier way to place fig paste into dough. Nabisco would gain control of the fig roll and the name would change to "Fig Newton".
Filling:
1 C dried Figs coarsely chopped (UPDATE: If you are a vegan who does not eat figs, try this recipe with dates, apricots or other dried fruits of your choice. Most will work very well!)
1-1/2 C Water
1 C Orange Juice apple will work here as well
1/4 C Sugar
1/8 tsp Orange Zest
Cookie Dough:
1/2 C vegan Margarine such as Earth Balance
1/2 C Sugar
FLAX EGG - 1 Tbl ground Flax Seed plus 3 Tbl water simmered for 5 minutes & cooled
1 tsp Vanilla Extract
1-1/2 C All-Purpose Flour
Make the fig filling:
Coarsely chop the dried figs.
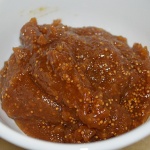
In a medium saucepan, add the chopped figs, water, orange juice and sugar and bring to a boil. Reduce to a simmer and cook for 2 hours, stirring occasionally. The mixture should reduce considerably (see how it goes from this to very little liquid left in photos below) and once pureed, be spreadable like jam. Keep a close eye on this towards the end, it goes fast. Transfer the mixture to a food processor and process until smooth. Refrigerate overnight
In the bowl of an electric mixer, cream together the margarine and sugar for 2 minutes.
We are using what's known as a "flax egg" here to simulate one egg white. To make the flax egg, combine 1 Tbl of ground flax seeds and 3 Tbl of water in a small saucepan. Simmer on low heat for 5 minutes, stirring until it becomes thick and gelatinous. Cool completely.
Add the flax egg to the butter/sugar mixture along with the vanilla. Mix to combine, scraping the sides of the bowl.
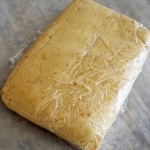
Add the flour and mix until the dough starts to form a ball. It will be very sticky at this point. Wrap in plastic wrap forming into a disc and refrigerate overnight.
This will make handling much easier.
The following day, preheat the oven to 350 degrees and line baking sheets with parchment. I normally use a Silpat, but parchment seems to work much better in this application.
Divide the dough and filling into four equal portions keeping the rest refrigerated while working with one at a time.
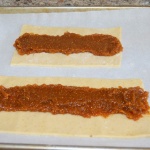
Shape one piece of dough on the parchment into a rectangle about 12" long and 4" wide. Trim if needed.
Spoon a line of filling down the center of each rectangle.
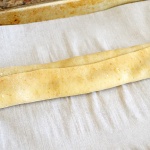
Fold one half of the dough over the filling, using an offset spatula or knife to assist you if needed. Repeat with the other side and then use the parchment to help shape and roll it seam side down.
- Refrigerate each completed log as you work with the next.
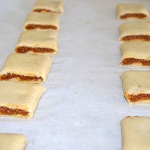
- Using a sharp, or serrated knife, before baking cut into 5 or 6 evenly sized cookies.
At this point, if the oven is not yet preheated, place the cut cookies into the refrigerator so they remain chilled.
Bake for 12-15 minutes until the edges are lightly golden. I always rotate the cookie sheets as I bake to ensure they bake evenly.
Allow to cool on a rack and then store in an airtight container.
They are best the next day as they have time to soften into the Newton's you know and love

No comments:
Post a Comment
I love comments so if you have a minute leave me your thoughts on the above post